November 23, 2008
Tools of the Trade 2 - Screen Printing
These days, most of my 'tracing' is done via screenprinting.
A recently finished project - while in the wax-up stage.
Lots of pictures, a few videos and a description of how I do screen printing on stained glass follows below the fold...
My Intro to Thermal Screen Printing - Print Gocco
I started screenprinting in 1992.
At that time, I was doing a number of drawings for stained glass by using an opaque marker on acetate. I liked the feel of it and I liked the look. But I was frustrated that I could not achieve the same look by tracing with a brush onto glass. Around that same time I took a screenprinting course at the Museum School in Boston, while I was first learning to use computer graphic programs.
It also helped that at the Museum School, screenprinting was taught as monoprinting - which is to say, not as a way to produce multiples but as a unique method of applying an image to paper. With some experimentation, I found I could translate the look of the drawings onto glass via photo emulsion screenprinting. Still, it was hard to justify the amount of time to make a screen via photo emulsion when you were only using that screen for one or at most a few pieces of glass within a panel.
I'd heard from a friend of something called Print Gocco. , which is a little machine where you made a screen and then made prints on the same machine. I wondered if I could use Gocco only to make screens, and to use those screens to print on glass.
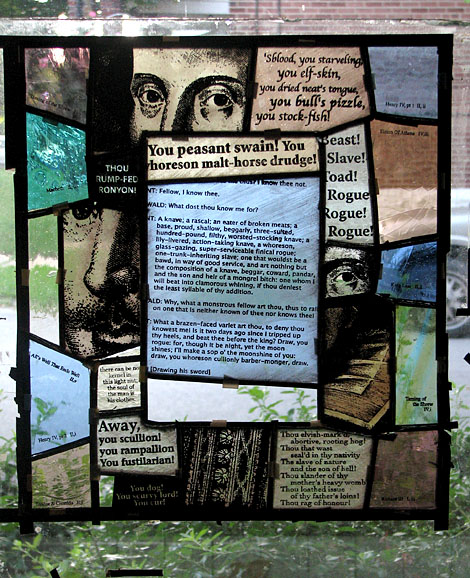
This was my first full panel incorporating screenprinted pieces with screens made using the Print Gocco thermal screen making equipment.
Arabesque #1, 8.375" x 9.375", 1992
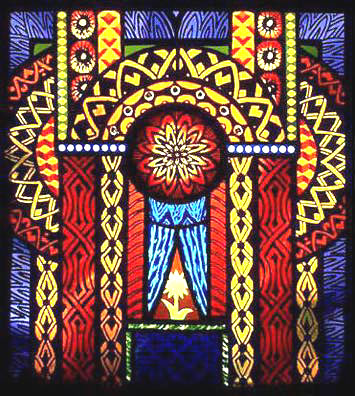
I could never have achieved the look of these pen drawn lines by using a brush on glass.
This video shows how Print Gocco works. The screenmaking part is covered in the first 2 minutes.
I soon learned there are serious limitations to using Gocco, for my work at least. One limitation is size, the screen area is only about 3" x 5". Then there is the cost. At the time I was doing it (early 90's), the cost was about $4-5 per 3" x 5" of screen area. That's not terrible for someone doing a holiday card or invitation, but the way I use screenprinting I will make anywhere from 10-30 screens for a single window (for example, the Shakespeare window needed about 25 screens). Gocco would be cost prohibitive, even if it were big enough.
At this point in time, it's all kind of a moot point, since Print Gocco has officially been discontinued by Riso, the company that made it. Screen material will still be available, but not the Gocco machines or bulbs or printing supplies.
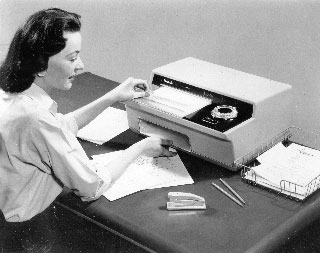
Thermal Screen Printing - ThermoFax
Thermofax is an old copier technology.
Thermofax technology is currently being kept alive, oddly enough, by tattoo parlors. This is a short video (0:41) showing how tattoo parlors use Thermofax technology, transferring a design from paper to arm using 'spirit masters'.
Aside from the spirit master, thermofax machines can also process a lower mesh count version of the same screen material as in the Print Gocco.
Thermal Screenprinting has been embraced by the quilting and fabric art community - as seen here in a Flickr image for Thermal Screenprinting.
Using a Thermofax machine to make screens is a workaround and in general it's tricky and temperamental, compared to the official methods of making screens. A Thermofax needs to warm up. Settings on the dial can vary widely. The heat/light intensity gradually weakens over time. I had a Thermofax for several years, and eventually, toward the end of it's life, I would have to run several sheets through to warm it up and also run a screen through more than once to fully process the screen.
There is a new version of the thermofax on the market, a German machine referred to as a Thermal Copier. I have yet to try one of these. But they are being sold in the US now through Marlene Watson and through Welsh Products.
The new thermal copiers.
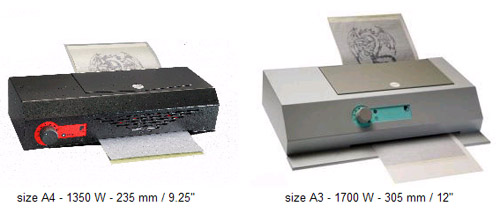
[update February 22, 2011 - a following is a YouTube video demonstration of the Panenka Thermal Copier, in German and English. The bulk of the thermofax info is in the first half, though the second half does give an interesting show of just how precise and specific the Germans can be in doing something as simple as placing tape on a frame. Bless em.]
Thermal Screen Printing - Screenfax
The Screenfax is a machine made by the same people who made Print Gocco. It uses Xenon bulbs to flash the screen in a way similar to the photo bulbs in the Print Gocco, only more reliably and efficiently.
It will make a screen at much lower per square foot cost compared to Print Gocco. Unlike the Thermofax, it will process screens of a much higher mesh count, allowing for much finer detail. With this machine you can even do larger screens, by flashing, moving the artwork, and flashing again.
This was officially marketed as the Xpresscreen XEF913 Exposure Unit, though it's the same thing as the SP-180, made by the Riso Corp in Japan.
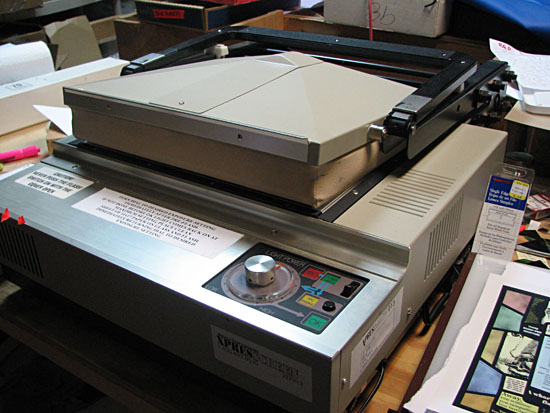
Screens and cut-out laser prints placed on the imaging area ready for the flashing.

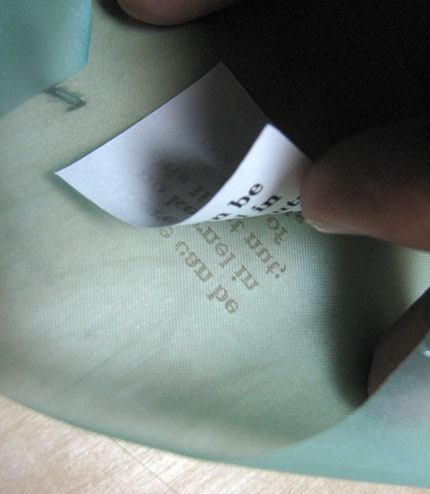
The finished screen peels off the paper if exposed properly.
and a video of me making a small screen...
[update January 24, 2009 - I just discovered the following Xpresscreen video on YouTube, which was posted just a few days after my original thermal screenprint entry - So, here is Xpresscreen's own demo of the Xpresscreen XEF913 Exposure Unit - added Jan. 24, 2009]
'Xpresscreen' -
On a final note - one question I get all the time. Isn't there anything else will process the screens? Something cheaper or easier to find? Could you use a laminator or even a clothes iron? The simple answer is no, these are the only ways at this time to make a screen using the thermal screen material. I've been using this process for 15 years and I haven't heard of any cheaper or easier alternative. There is some inkling of a direct computer-to-screen screenmaker, but I haven't seen it yet and it will certainly be at least as expensive as any of the options today.
[update - Jan 24, 2009 - The Xpresscreen YouTube channel also has a video demonstrating the new direct to screen machine. Worth checking out though it doesn't appear to be the same process as the Riso machines, though it's hard to tell from the video. The machine is bigger than I expected and subsequently I can only expect it to be very expensive]
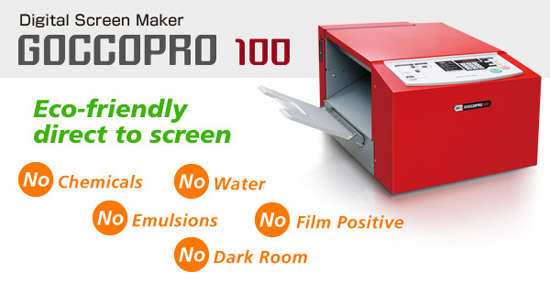
[update February 22, 2011 - There is a new Gocco Machine on the horizon. Via a post about thermofax by Guenther Panenka comes news of a new venture by Riso called GoccoPro 100, a new "digital direct-to-screen" screenmaker. Due out the spring of 2011, it is expensive (Panenka quotes it at precisely $14,383 US dollars), but intriguing. A promo picture below...]
Screening the Paint onto the Glass
At this point the screenprinting on to glass is the same as in screening on any other surface.
With small one-off pieces (most of what I do) I usually just tape the screen to the surface. I've talked to some screen-printers who are horrified that I don't mount the screen in a frame and and set the proper tension and screen it 'off contact', etc, etc. Xpresscreen does have a method for stretching the screen and working off-contact, and it works well. But most times, for what I'm doing, it's just not needed. I can achieve the result I want this way just fine. It's important to remember I am not doing this to make many multiple images that are exactly the same.  .
.
I'm usually only making one or two 'prints' off a given screen. The consistency of the paint is always more important than all the fiddling with the screen.
I use Reusche traditional vitreous glass paints. In this case I've used pre-mixed lead free tracing black mixed with D882 Oil medium. Oil has several advantages over water based media. It dries to a hard smooth texture which you can scratch into to fix lines. Also, you can treat it like scratchboard and scratch white lines into it.
The tools are simple and basic. A palette knife to do the final mix of the paint for the proper consistency, a plastic spackling knife used as a squeegee (on larger pieces I use a standard screenprint squeegee), and a handy brush to touch up pieces as needed.
This is just after screening the Shakespeare face section, showing the simple set of tools needed -

A pile of little screens ready for printing.
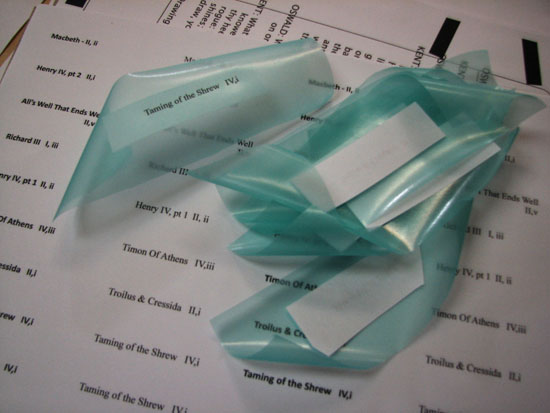
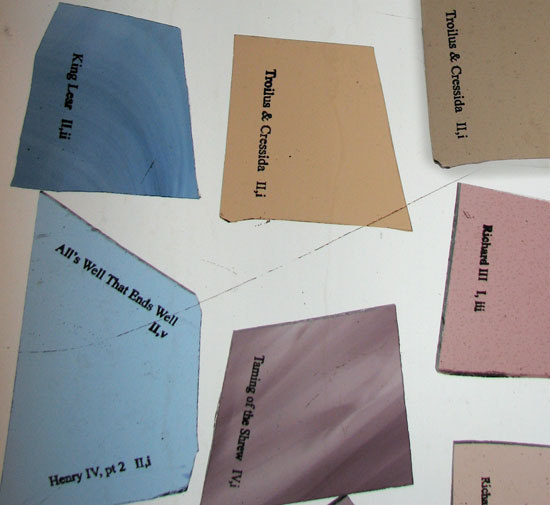
The same names after screening and before firing.
Being traditional glass paints, the pieces are fired in a kiln to about 1250 degrees fahrenheit. After firing, the paint is permanently fixed in the glass.
Posted by Tom at November 23, 2008 01:39 AM