June 19, 2008
Max Pechstein Stained Glass at the Busch Reisinger
I've posted about expressionism and stained glass before and mentioned that I had seen a window by Max Pechstein but did not have any photos. I finally took some photos and finally got around to posting them.
Max Pechstein (also a wikipedia entry)
at the Busch Reisinger Museum, in Cambridge, Mass., USA.
photos by me, circa 2006
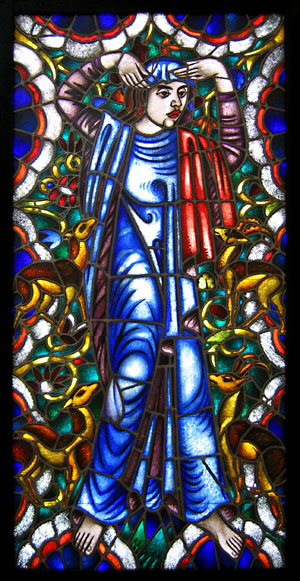
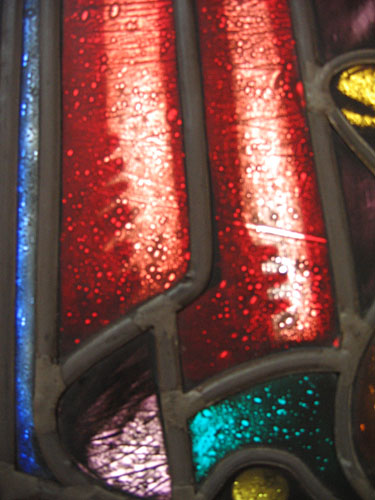
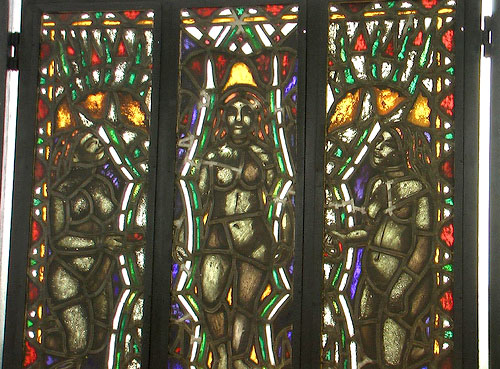
It's called "Woman with Animals" and is dated from 1912. No other background information was given on the wall placard and I could find no other info on the web. Still, I have detail photos and a little context...
[update: June 29, 2008 - I guess this panel will not be on display for awhile since the building housing it, Otto Hall, though only 17 years old, is being demolished, because of structural defects that happened due to an elaborate climate control system that failed. Personally, I never much liked Otto Hall and much preferred it when all the Busch-Reisinger collection was displayed in Adolphus Busch Hall, un-modern and non-climate controlled as it was.]

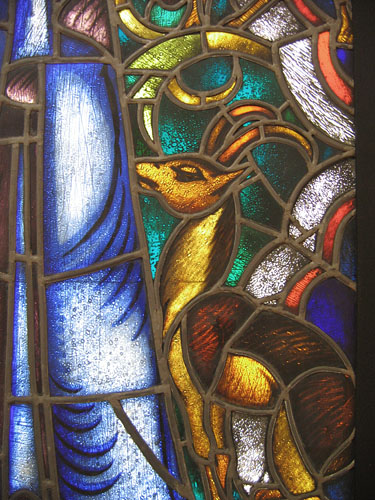
Almost all of the pieces in the clothing of the figure is acid etched flashed glass, while none of the glass in the background or the glass for the animals is etched.
For some context - in the gallery.
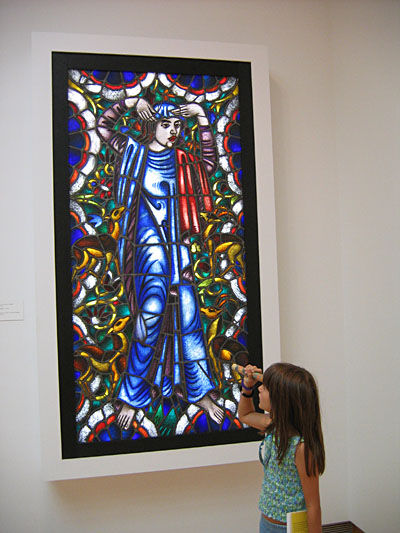
My then 7 year old daughter Gwyneth looking at the panel with her pocket kaleidoscope.
The Flickr search for 'Pechstein stained glass' yielded this panel form the Brucke Museum in Germany.
I wonder if it's the quality iof the photo or is this really much darker and indistinct.
Three Female figures flickr search
Pechstein as Printmaker
Yikes, They never published anything like this in my Sunday school textbook. These rather striking prints are part of a 12 print group illustrating the The Lord's Prayer (Das Vater Unser), from 1921.
Now these images are images I would like to see turned into stained glass, if only as an exercise in translation.
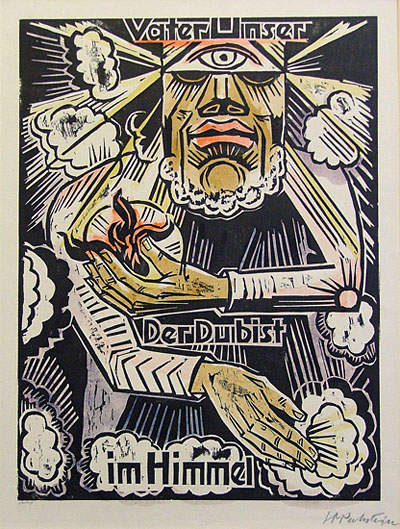
The text for this particular print translates as"Our Father, who art is Heaven".

This text here translates as "The Power and theGlory".
The whole series can be seen on this Flickrset on Max Pechstein Prints and referred to in his Blogpost about seeing the prints at the new German Expressionist Exhibit at the Los Angeles County Museum of Art.
June 12, 2008
Tools of the Trade 1 - Glass Cutting
A new feature showing off the tools of the stained glass trade. Nothing comprehensive, just a description of how I use them myself and some comments on how the tools are changing (or not) within the current workplace.
First up, glass cutting tools.
My current glass cutting tools -
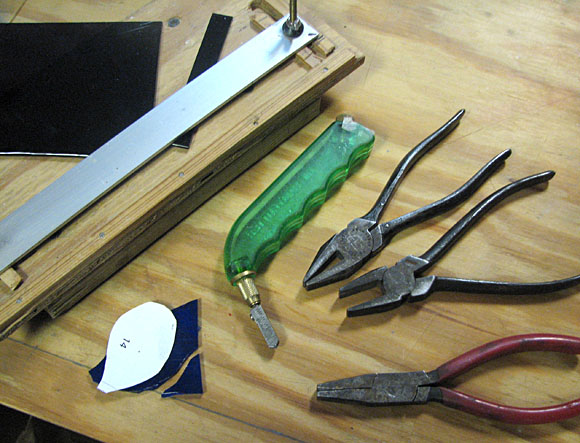
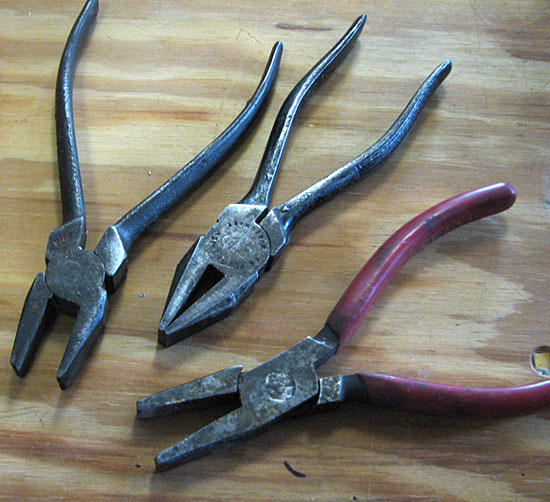
Glass Cutters
Glass cutters I have on hand.
At the top is a diamond cutter, in the middle is a Toyo carbide wheel pistol grip cutter, and at the bottom is a Fletcher-Terry steel wheel cutter.
All of these cutters work on the same principle. The cutter is used to 'score' the glass, after which an opposing pressure is applied to run that score through to the other side to make an accurate 'cut'. For more detailed info on how glass cutting works, there is a good 'fundamentals of glass cutting' page on the Fletcher-Terry website.
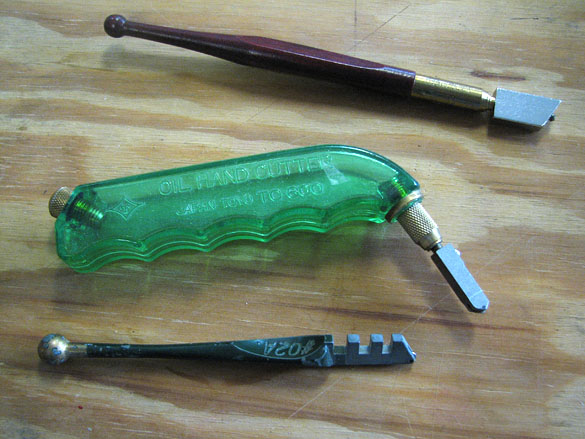
Diamond Cutter Detail
Diamond cutters are still the European standard, but rarely used in the USA. Indeed, these cutters are almost impossible to find in the USA. I was given this one some years ago by a Scottish friend and colleague but still haven't quite figured how to use it. I do use it sometimes for a good deep score on a tough-to-cut piece of glass, like cutting apart a bottle.
Fletcher steel wheel detail
This was my standard brand of cutter for many years and is the one used most by professional studios. They come in different styles with straight or ball ends (ball ends for tapping a score) and with larger or smaller wheels (smaller wheels for more intricate cuts). Fletcher also makes carbide cutters in this form and in self-oiling 'stick' and pistol grip forms.
The Fletcher cutters never held up for me and I remember having to go through several in a jar to find 'the good one'. The cutters would have one 'feel' when they were fresh out of the package, then another as they were broken in and eventually they would develop the dreaded skipping score, that meant the cutter was toast. In my experience, a standard fletcher cutter would last in a professional setting anywhere from 1-6 months.
So, IMHO, Fletcher cutters are good basic cutters, cheap and easy to find - but too fussy for my taste.
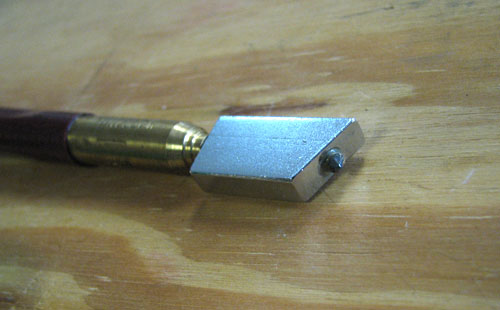
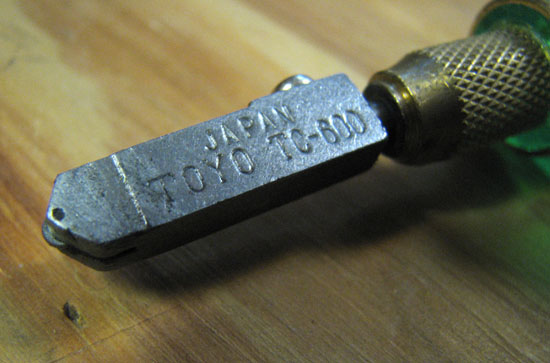
Toyo cutter detail
I never even saw a pistol grip cutter until I was working professionally for perhaps ten years. I began using the Toyo when I was doing a lot of strip cutting while making quarry panels. It was easier and more reliable in making long straight cuts. Gradually, I came to use the pistol grip for pattern cutting as well. Now it's my main cutter. It will last for a remarkably long time, which is good because it's not cheap (approx. $35-40 USD retail compared to about $4-7 for a standard Fletcher cutter). Most Toyo cutters will last 1-3 years, and that's without changing the cutter head. Note that you should never ever use the plastic part for tapping the glass like the ball end of a Fletcher, it will eventually break the plastic. I know this from personal experience.
Some professionals will scoff at the notion of using a pistol grip cutter, and many will suggest that it's only for amateurs. Studios can be quite fussy about what type of cutter you use and how you use it. I've never understood this. As long as you cut accurately (even better - quickly and accurately), then what difference does it make what cutter you use or how you use it?
Similarly, even when I did use a Fletcher cutter, I was considered an unconventional glass cutter by some because I was a 'push' cutter rather than a 'pull' cutter. That is, I pushed the cutter away from me rather than pulled it toward me while cutting. With the Toyo, I'm a 'pull' cutter when cutting on a jig and a 'push' cutter when cutting using a pattern.
A few tips re: the Toyo -
1) The handle is a reservoir for lubricant. There are many types of cutting lubricants available, most of them oil-based. I use a thin oil-based lubricant (called Liquid Wrench) but only a small amount (about a tablespoon) at any one time. Putting in any more tends to let out too much of the lubricant while cutting.
2) The Toyo is also available with a wide head for strip cutting. I find the standard head works better for both pattern and strip cutting.
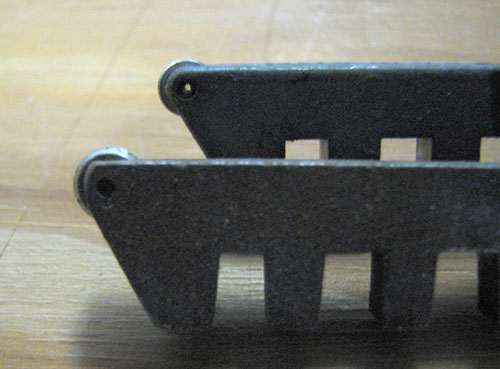
Glass Pliers
These are non-serrated Knipex glass breaking pliers and at bottom, a pair of Knipex flat nose grozing pliers. I don't like serrated pliers for breaking or grozing, nor do I like pliers that attempt to be a combination breaking/grozing plier.
Some people like to use running pliers, which are pliers that have a curved face so you can apply pressure on both sides of the score while squeezing the pliers. I never use running pliers, not even for long straight cuts.
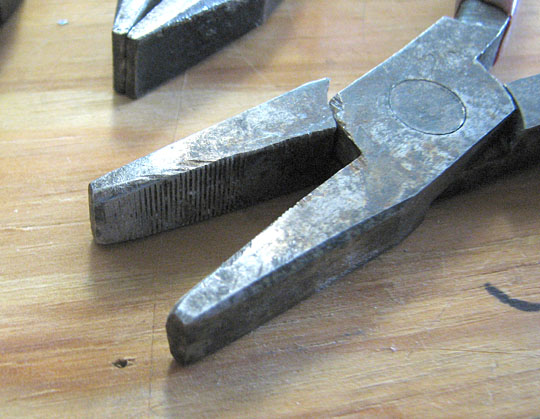
Grozing is where you nibble away the extraneous bits after making the basic cuts. Itt's also where you nibble into an inside curve and can be used (usually during assembly) to make the piece smaller if initially cut too big. Grozing pliers are probably the most individualistic of all cutting tools in terms of preference. The image shows how I like my grozing pliers. Soft metal flat nose Knipex grozing pliers when the slight serration inside wears off and there is a just enough wear on the edges to round the corners, not too little, not too much. This pair is at the early stage of how I like it.
Cutters can be extremely fussy about their grozing pliers. I suppose it has to do with the fact that so much of grozing has to do with feeling the glass being broken away. Some like brand new pliers, while others will only use very well worn pliers. The most commercially available grozers are serrated and have a small space between the blades, while the ones I use are flat and the blades meet flush. I've heard of some who have heated and tempered pliers and some who have ground down the blades to make them 'pre-worn'. I worked at one studio where they fashioned their own grozing pliers by welding 2 pieces of 3/8" flat rebar on to the end of lineman's pliers. They sort of looked like duck-billed grozers. To each his own.
Jigs
This is my mini-strip cutting jig. Mostly used for borders for small panels.
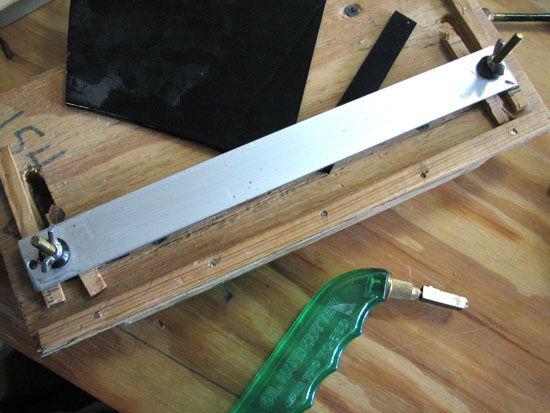
I started making strip cutting jigs when I was doing Quarry panels, as in the panel Four Women. I am totally sold on jigs for strip cutting because they add speed and are far more accurate if used properly. This mini strip-cutting jig gets a good deal of use considering it only does one thing. I've made ones to accomodate full sheet size but don't have one in the shop right now.
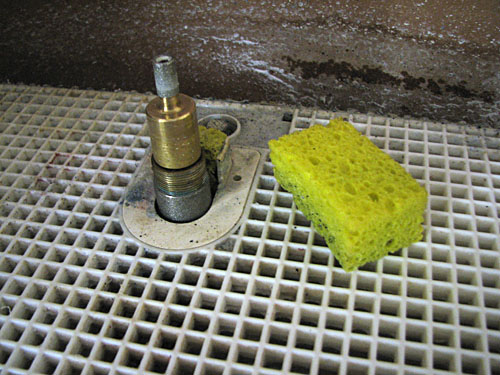
I've used a few different circle cutters over the years. The Fletcher circle/oval cutter is good and accurate but expensive (approx 135 USD). I have an Inland that serves my meager circle cutting needs.
I've never tried commercially available jigs nor have I used any kind of glass cutting 'system', like the Morton system. I've heard of a few people who swear by them but I've never seen a professional studio use one and from the descriptions I don't see the advantage. Who knows - maybe I could be swayed some day.
Glass Routers, Grinders, Saws, etc
Grinders, routers and saws have only been commercially available for the stained glass studio for about 30 years or so. They are another of the tools developed for the hobby trade that many professional studios have slowly (and sometimes only grudgingly) adopted in their studios. I do have an Inland grinder which I use for close fitting on copperfoil pieces since I like thin lines when working in copperfoil. I hardly ever use the router when cutting for lead came panels. These days I use the router as much for engraving flashed glass as for helping in cutting.
I have used various bandsaws and ring saws in different studios over the years, but don't have one in my studio. At this point in my work, I don't tend to incorporate deep inside curve cuts and the like, so I really don't have the need.
I've never worked in a studio that used a laser or water jet cutter for stained glass work. For the vast majority of studios the capitol expense is simply not justified, and the limitaitions of these high volume production cutters is not acceptable. I've nothing against them, but I don't see much of a future for them in most stained glass studios unless they come in smaller, cheaper and more flexible packages.
Useful Sundry Items for a Dangerous Art
Don't forget those safety glasses!
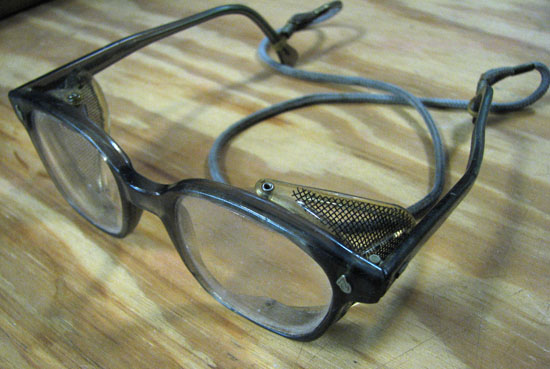
I'm not too picky about the type of glasses, but the lanyard is important. Before I got the lanyard, I would take the glasses off while concentrating on what glass color was needed next, then when I was ready to cut I couldn't find the glasses. Over the years, the lanyard has saved me hours of frustrated searching.
I'm generally not one to over-do the brand loyalty thing - but let's face it, Band-Aid brand rules.