November 08, 2011
Light Table for Panel Assembly??
The recent BBC documentary called Britain's Most Fragile Treasure is still online on Youtube. I was watching it again and noticed something curious.
Toward the end, starting at about 49:10, I noticed that the glazing table being used to assemble one of the panels is also a light table.
A screenshot showing that this is a light table.
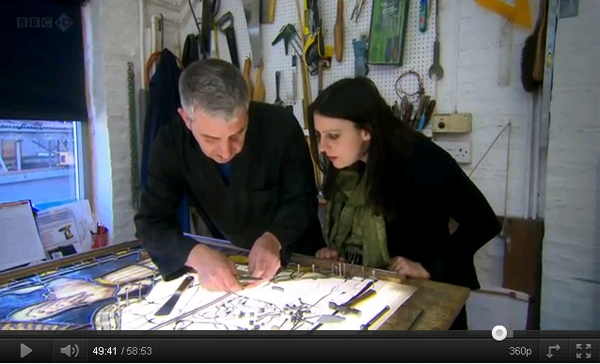
This is a great idea, especially if you have a delicately painted window where there are very specific lines that need to match up from piece to piece.
But I've never seen a combination of translucent light table and assembly surface. Generally, on assembly surfaces, you need to be able to pound in glazing nails to keep the pieces in place while assembling. All light tables have a surface of either glass or plastic, neither of which can you just start pounding nails into. Most people today assemble stained glass windows on sheets of plywood. So - what materials are being used? What allows for translucency while being able to put nails or stoppers in while assembling?
I think the clue is in the close up shots.
Now, if you look at the close-up you can see the nice layout cartoon with the notations for broken pieces, etc. You can also see a regular pattern of dots which appear to indicate some kind of perforated plastic sheeting, the dots being holes in the plastic, and which receive the nails.
click on the image to see it larger -
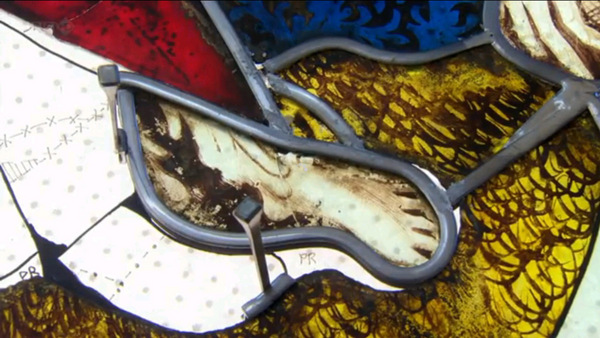
So my guess is that this is using something like a perforated polypropylene pegboard, perhaps similar to that which is shown on this website.
In any case, I want one!!
Ill update if I get any additional information.
October 11, 2011
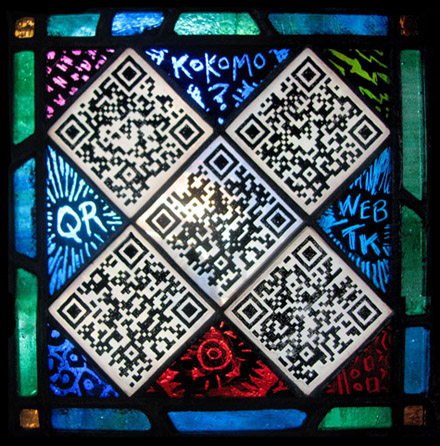
QRazy Glass, part 1
I finished this panel last July, making it to show friends at the AGG conference in Asheville. It's my first, and so far only, attempt at incorporating QR (quick response) 2D barcodes into a stained glass panel.
Below the fold, in part 1, I'll do a brief intro to the QR code and have links to a variety of projects using QR codes - in art, illustration, and public monuments, and in uniquely creative public signage.
In the next few days I'll post part 2, where I go over how I made the prototype panel, and how to make your own QR code and some of the unique issues raised by trying to incorporate it into stained glass.
What is a QR code?
Basically, it's an image that can be read by a smartphone that will instantly call up text, link directly to websites, get contact information placed straight into your phone, upload images, go to map locations, and more. For more detailed info on its history and background - QRcode wikipage). More interesting to me than the technical details is how might these interactive codes be used in art, illustration and architecture? Is it worth the extra effort? Could it be more than a passing fad? My own interest was sparked in a similar way to this comics artist who found out about the QR code by visiting City Museum in St. Louis - How to Get a Quick Response from your Comic Book Customers
How can I read a QR code?
QR codes are mostly read with a smartphone or tablet with a camera. There are many readers available for free download, in all types of smartphones. Go to your app store and search for "QR reader" and many free apps will show up. I have 6 different QR readers on my phone, all for free. Red Laser, Qrafter and 2DSense seem to work the best on my iPhone. I've heard Zxing is best for Android phones, since Zxing comes from Google itself.
You can also decode a QRcode by submitting an image of it to this Zxing Decoder. It will give you the underlying text or link.
QR Code Projects in the News
These are some of the more interesting projects I've heard about that incorporate QR codes. I'll add more as I hear of more.
Arbor Day Event with QR codes, Central Park New York, 2010
World Park Campaign, Central Park, NYC, Arbor Day 2010
Tattoo Artist and Animation Mashup Using QR Code
Tattoo Artist tattoos QR code linked to Animation
Balloon QR code Illustration for Magazine Cover
NY Times Magazine cover, December 2010
click to enlarge image, scan to go to New York Times "year of ideas" website.

The most amazing thing to me about this is how well the code can scan when it is so roughly formed, with balloons no less!
QR Code Quilt
QR Code Quilt by Rubi McGrory out of Savannah, Georgia
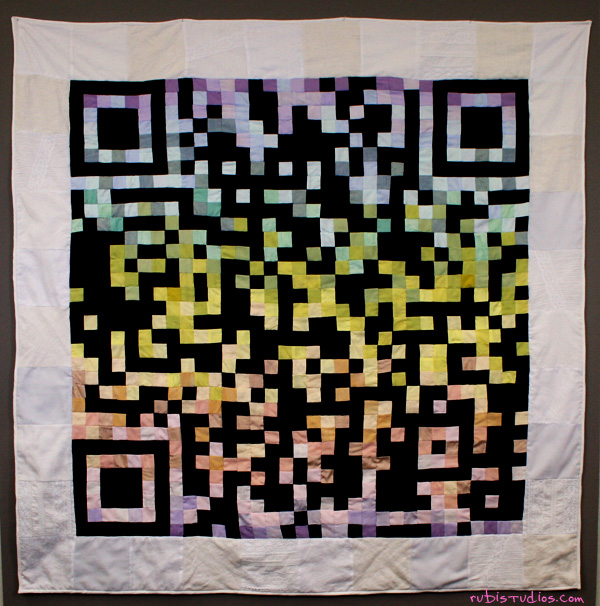
The encoded text message is nice, but hardly seems worth the effort of encoding it in a QR code in the first place.
QR Code links to Memorial Website on Tombstone
This creeps people out a bit. Understandable, it's a cemetary. Still, I could see a similar idea coming into use in memorial stained glass windows.
QR Code on Tombstone Creates Dynamic Memorial. The QR code links to a memorial website.
(via Mashable)
QR Codes in Ceramic Tilework
The nature of the QR code would seem to lend itself especially to the medium of ceramic tiles. Here are 2 examples -
A QR Code Link with the Past, with a QR code done in ceramic tile as part of a larger figural sculpture.
Talking about iBarga is a tourist campaign for a medieval town in Italy. The city itself has QR codes throughout explaining the different sites to see, with audio guides and website information linked to the QR codes. The QR codes are fired into ceramic tiles and installed permanently. A video about the project.
In the next few days Ill post more specifically about my stained glass QR project and how QRcodes might be incorporated in future stained glass projects.
In the meantime, one more thought to ponder...
Is there already a QR backlash?
There are naysayers, especially in the world of advertising/marketing, as in this article - Death to the QR Code. The reality is that this might be a fad and the technology could disappear in the next decade, or the next 2 years. Or it could hang on. Everything tends to cycle very quickly in computer and internet technology, often gauged in months rather than years. Did you know that QR codes are not a new thing but are making a comeback (just one example - QR codes making a comeback with Wikipedia?).
What will happen once the novelty wears off? How long will it take for the technology to be totally supplanted by something else? Will there be any way to read these in 10 years? 20? 50?
How much does it matter?
July 11, 2011
Kokomo Glass Videos
In the past 2 months several videos have popped on YouTube showing how Kokomo Glass makes their machine rolled sheets of glass. The best ones are from Komo's own YouTube Channel, kogvideo.
Annealing Glass
Short but interesting to note that their sheets only take 45 minutes to go through the annealer. Surprisingly short period of time.
Below the fold are an assortment of other Kokomo Glass related videos, of varying interest and quality...
Posted about mid-June 2011, by YouTuber roguepuppet
A group of videos recorded on phones depicting the process of making rolled sheet glass at Kokomo Opalescent Glass. More interesting insight, even if the image quality is rough and the videos are short.
Kokomo Opalescent Glass Factory, making sheet glass, up close - short (just 45 seconds). Shows how the gatherers place the molten glass on the bed and the mixer mixes the colors and places it into the rollers.
Kokomo Opalescent Glass Factory, pulling cooled sheet glass off the line
Another short video, with different angle of gatherers bringing molten glass to the roller.
Kokomo Opalescent Glass Factory, prepping glass for roller
Not terribly exciting to see, but unusual to see a roller change on the machine.
Kokomo Opalescent Glass Factory, prepping glass for roller
July 09, 2011
Victoria & Albert Conservation Issue
Hadn't seen this until recently. There is a lot of interesting stuff to read about and it's good that it's online, but I still don't like the way that the new V&A is displaying their medieval stained glass. I hate hate hate the white surround. It's just... wrong.
Conservation Journal, Autumn 2009 Issue 58 special edition
May 26, 2011
Uroboros Sheet Glass on YouTube
Three short videos on the making of Uroboros sheet glass.
Uroboros Drapery Glass
Specific hand rolling process for making the folds in drapery glass
Uroboros Glass Studio - the most interesting thing is to see how the colors are mixed, in a matter of seconds, on the table before going into the machine roller.
The Alchemist's Opus: The Art of Handmade Glass
March 24, 2011
Uroboros Video
Video called "The World of Uroboros", from The EdHoy YouTube channel, with some nice shots throughout of the process of making hand-rolled glass sheets.
December 03, 2010
Videos - Small Sheet Glass and Jewels
2 interesting little mini-videos showing the making of small hand-rolled sheets of glass and glass jewels. It's nice to see the process, I only wish they would show examples of the final result, after annealing.
Small Sheets
Pressed jewels
November 02, 2010
October 20, 2010
Building Great Cathedrals
Building the Great Cathedrals started airing last night on PBS stations. I haven't seen the whole thing yet, but here is the trailer -
You can see the whole online video here - Building the Great Cathedrals. Though stained glass is mentioned throughout, the one segment dealing directly with stained glass is short, from about 34:15 to 38:00.
My first general impression - much to like and much to drive me crazy.
I hope to elaborate later.
September 28, 2010
Painted Window Blog
A new stained glass blog is in town, by J. Kenneth Leap. It's called The Painted Window, and in just the last two days Ken has posted no less than 20 entries, all on his tests with silverstains. He's been doing very meticulous tests and getting some unexpected results. I have seen some of these results already, as I was at the recent AGG conference in Detroit, where he was happily showing off samples of his tests, like this set of samples using Reusche silver stains on a wide variety of glasses. This is far and away the most comprehensive set of silver stain test samples I've ever seen, and every studio I've worked at has done some type of silver stain tests.
Click to see a bigger image
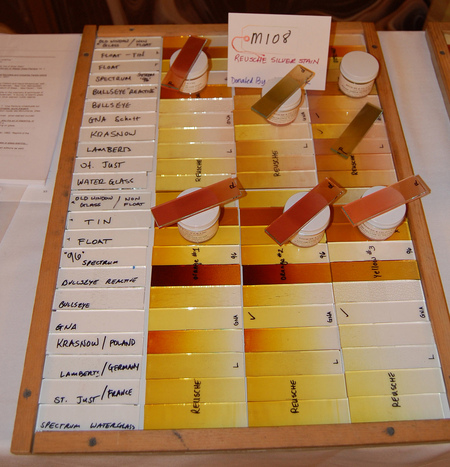
Ken, thanks for being so generous with the results of your tests, an incredibly useful resource. I hope it sparks a silver stain renaissance, all thanks to you.
July 09, 2010
Photo Emulsion and ThermoFax Machine Videos
As a preview for my workshop at the American Glass Guild Conference in Detroit in 2 weeks, I've gathered these YouTube videos that demonstrate various methods for photo transfer screen-printing. Though all of these are for screenprinting on fabric, the procedures for making the actual screens are the same if you are printing on glass.
The method that I will be using is 'thermal screenprinting'. You can read about that on my blog post from 2008 called Tools of the Trade 2 - Screenprinting, and here is the brief video I did for that blog post.
5 more videos below the fold...
Photo Emulsion Screenprinting
This video shows what might be called the "traditional" photo emulsion screen making method, where a photo sensitive emulsion coats a screen, then is exposed to light and washed out with water. Note that this is how it's done on the cheap.
Another video showing the photo emulsion method, only showing a more common way of doing this process, using dedicated exposure units and more robust washout equipment. The vast majority of t-shirt printing is done using this screenprinting method.
ThermoFax Screenprocessing
You don't really need to see the whole thing, just the little bit showing her feeding the material into the machine (sped up for no reason) from around 00:12 to 00:55
This shows another person making a screen on a thermofax machine.
This gives an idea of how free form you can go with the thermal screens. I've done this kind of thing on my glass work, where I have a loose screen and apply the paint more improvisationally.
July 01, 2010
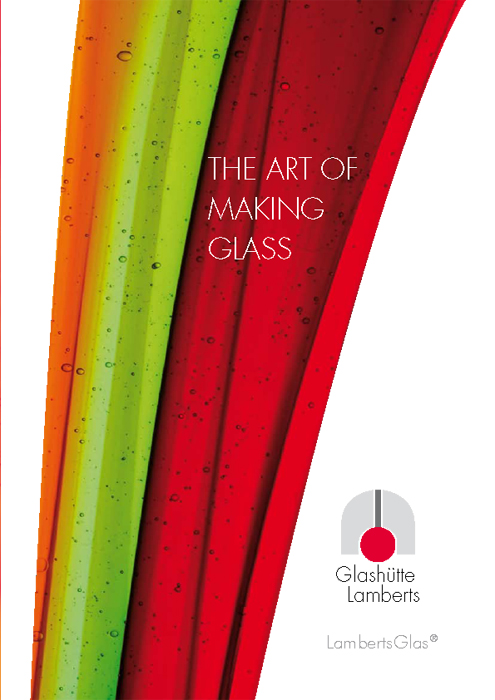
Bendheim Art Glass
Bendheim Glass has a new website for Bendheim Art Glass, which is basically their stained glass or, perhaps more accurately, their artsy architectural glass division.
Check out their fancy new "The Art of Making Glass" brochure (48 page pdf file, 3.9mb).
Very nicely done.
April 30, 2010
For Digital Images, Resolution Matters
Nearly everyone in stained glass now archives and promotes their work using digital images. Because of this it is important to understand the concept of image resolution and to be able to determine whether an image is high or low resolution. The image on the left is high resolution and on the right it is low resolution. Using low resolution images in marketing your work can make you look sloppy and unprofessional.

So, resolution matters.
Richard Gross of the Stained Glass Association of America recently published 2 articles called "Resolving Resolution" in the Winter and Spring 2010 issues of Stained Glass Quarterly. He goes on at length about the cameras, and what pixels are, etc.
My take on it is simple - think in terms of pixels. You don't even need to know what a pixel is exactly. What you do need to know is how to determine what size an image is in pixels. Then, if you know how the image will be seen (web? inkjet printing?, book publication?), you will know if the digital file is usable. It takes a little getting used to, but it really is quite simple.
A little further explanation, a few graphics and a handy chart below the fold...
Resolution is determined by the number of pixels per inch. The more pixels, the higher the resolution. In general, you want to start with the highest number of pixels you can.
So, the general rule is that the higher resolution the better. But what if you've been given a file and want to know if it will work for what you need it for?
How to determine what is a low resolution image or a high resolution image?
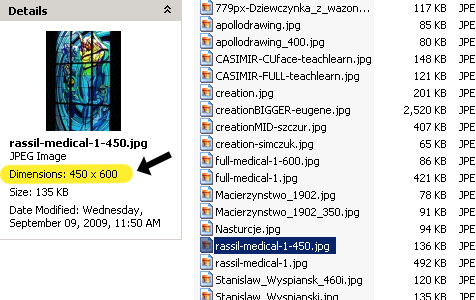
First, look for the dimension in pixels. You can do this from a folder on your computer. You do not need computer graphics software.
Select a digital image on a windows PC and you will see the specifications for that image appear to the side. I've highlighted where to look. This shows that the image is 450 pixels wide by 600 pixels high, which is low resolution.
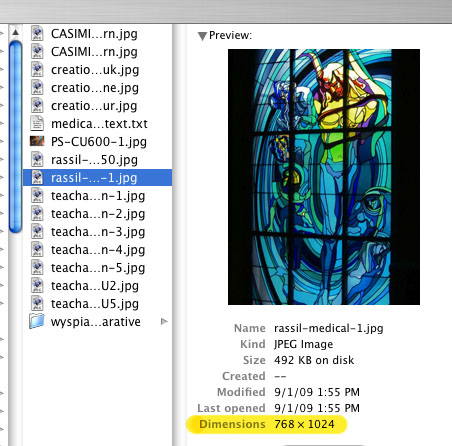
Here is the way it looks on a Mac, and again the dimension is in pixels. You will note that this is a slightly higher resolution, at 768 pixels wide by 1024 pixels high. This could used, in a limited manner, in digital printing but still would not pass muster in offset printing, unless printed very small..
Next, how to tell if the file you have is usable for the task at hand?
Are you using an image for a website or blog? Or for digital printing, which would include home or office printing on inkjet or laser printers. Are you submitting images to be printed in a magazine or book, where the image will be printed on an offset press?
This is a chart that shows how different resolution images size up in different output scenarios. As you look across the chart you will see how big the image will be in the 3 different scenarios, without image degradation.
Click on the image to see a larger image, or download the Resolution Chart PDF
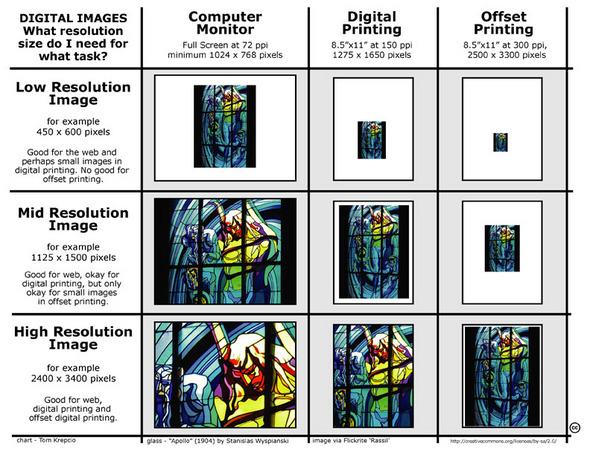
Keep in mind that this is a general rule of thumb and does not cover every situation. Not to mention the obvious, that if you do not have a high quality photograph in the first place, if it is out of focus or poorly lit, then the resolution is irrelevant.
One key rule to remember.. You can turn a high resolution image into a low resolution one, but you can never turn a low resolution image into a high resolution one. It will look jagged and fuzzy and terrible. Always take your digital pictures at the highest resolution, especially if you ever think they might be printed at any time in the future. You will have much bigger files to deal with, but the trade-off is worth it.
You're a professional. Look like it!
February 25, 2010
Spinning Plates, that is... Rondels
In the world of glassblowing, the making of rondels is often referred as "spinning plates", which is similar to the way of making window glass in large rondels called crown glass. Recently, it occurred to me to search for the term 'spinning plates' in YouTube and it turned up these 2 videos about spinning plates.
These two are from the same YouTube channel and seem to be from the same person. This one is from a public demo, with a microphoned glassblower and funny banter.
This is apparently the same guy, but not with the theatrics. The technique looks basically the same.
I've now 'favorited' enough rondel/crown glass/spun plate related videos to make a Crown/Spun /Rondel Glass playlist on my YouTube channel, VitreosityInMotion.
December 15, 2009
Sanford Bray
Last August, I posted this patent issued to Sanford Bray in 1886 for what we now know as the copper foil technique. A man named Patrick Horn saw that post and sent me some further information on Bray. Patrick found it while doing genealogical research. I thought I would put the info and documents out and see if anyone is interested in them. It's all a bit of a puzzle, but the pieces from Patrick do seem to fit, even if they still leave a very incomplete story.
Joining Glass Mosaics (links to full patent on Google Patents)
by Sanford Bray, Boston, MA
patent # 349424, issued 1886
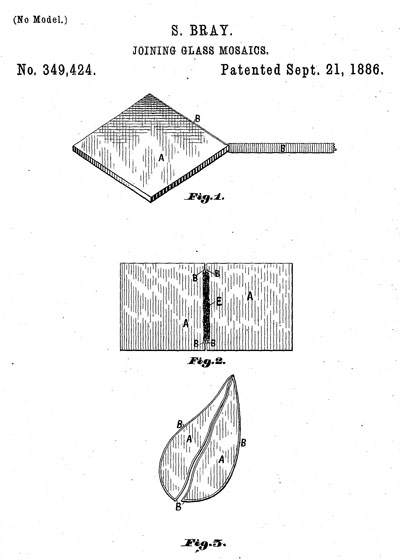
The most interesting and surprising fact is that this patent was issued to Bray when he was only 27 years old.
The images from Patrick Horn, plus some text, and a little comment after the fold...
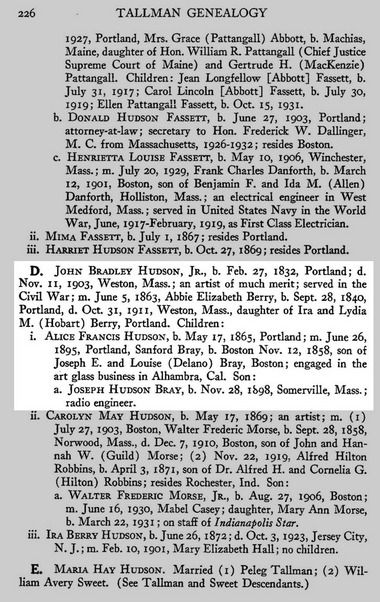
from a biographical entry on John Bradley Hudson Jr., a painter who was Sanford Bray's father-in-law. -
click to enlarge in new window
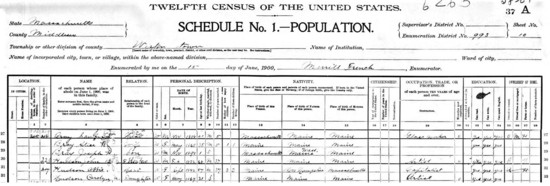
1880 Census Document with Sanford and his father and mother.
click to enlarge in new window
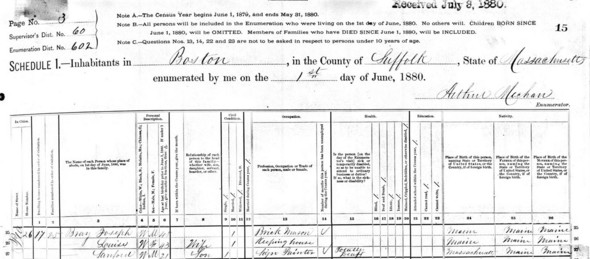
Sanford was 21 in 1880 and is listed as a sign painter. The most surprising thing in this census entry is that Sanford is listed as 'totally deaf'. No other document lists this.
1900 Census document - clipped to show only the Bray and Hudson families
click to enlarge in new window
1930 Census document - clipped to show only the Bray info
click to enlarge in new window

Painting by John Bradley Hudson Jr.

Portrait of John Bradley Hudson Jr.

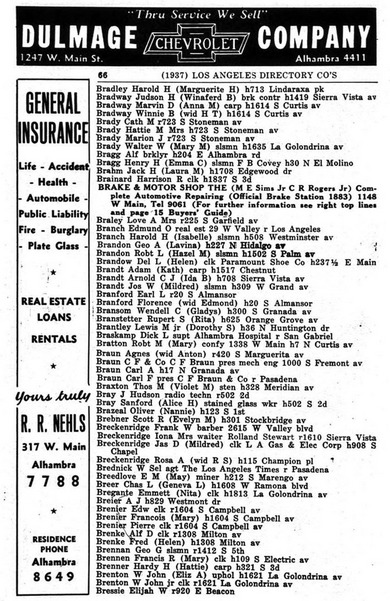
Los Angeles Directory, 1937, mentioning Bray, his wife and son
This is the text info I got from Patrick, from census records mostly.
Patrick Horn - dec 8
I still don't know when Sanford died, but I found him up until 1943 (age 85) in Alhambra, Los Angeles Co., California. I found old U.S. City Directories with him, his wife (Alice Francis Hudson) and his son (Joseph Hudson Bray). The last one which stated his occupation (Stained Glass Worker) was from 1937.
Sanford Bray
Birth - 12 Nov 1858, Boston, Suffolk, Massachusetts
Death - California
Parents & Siblings
Father - Joseph Bray (1833-)
Mother - Louisa Delano (1831-1890)
Spouse & Children
Spouse - Alice Francis Hudson (1865-1951)
Son - Joseph Hudson Bray (1898-)
1886
21 Sep - Age: 27 - U.S. Patent
Boston, Suffolk, Massachusetts
Patent for Joining Glass Mosiacs
1888 - Age: 30
Company Purchased By Tiffany's
no source
1895 - 26 Jun - Age: 36
Marriage to Alice Francis Hudson
Portland, Cumberland , Maine
1910 Age: 52 Residence
Waltham Ward 3, Middlesex, Massachusetts
source 1910 United States Federal Census
1920 - Age: 62 Residence
Waltham, Middlesex, Massachusetts
source 1920 United States Federal Census
1930 - Age: 72
Alhambra, Los Angeles, California
Occupation: Artist
source - 1930 United States Federal Census
The pieces do fit in with this Sanford Bray being the one who had the patent issued to him in 1886, but some questions remain.
Did Tiffany indeed purchase the patent in 1888? I have only ever heard that Bray sold his patent to Tiffany in 1888. I've never seen or heard of any documentation to confirm this. I'd be curious to know what the Tiffany scholars think of this.
There is also the question - If Sanford Bray remained working in stained glass all these years, where is the evidence of his work? Since he is listed, variously, as a 'stained glass worker' and a 'lead glazer' rather than as a stained glass artist, it would be easy to assume that he was not a designer, and therefore no designs of his would be around. But maybe not. Nevertheless, he either worked for other studios or had his own studio all these years. What studios? What kind of stained glass work did he do? There is no evidence of this.
I suspect the idea of who is Sanford Bray will remain an open puzzle for some time. I'll update if I get further info.
December 06, 2009
Google Patents 4 - "Dynamic Stain Glass Window"
As proof that people are still out there inventing new stained glass related technologies, there is this very recent patent. So recent that it's only a patent application, from May of 2009, just over 6 months ago.
DYNAMIC STAIN GLASS WINDOW
Don M. Ferris
Application number: 12/471,438
Publication number: US 2009/0233030 A1
Filing date: May 25, 2009
The idea is for a mechanism to revolve one circular stained glass window in front of another stationary stained glass window, to create some kind of light pattern. It's not specified if that light pattern is projected or only visible looking at the panels themselves. Even with the photos of the prototype (figures 11-13) it's a little hard to imagine what the effect is. The prototype appears to have a stationary window with square bevels, and a moving panel with an abstract design. I've never heard of Don M. Ferris and the only thing that comes up on a Google search is the patent.
I've noted before about how patents often patents are written in a way that they are hard to read. Kind of like that last sentence.
I thought it might be because most of the patents I've looked at are more than a hundred years old. But the same applies to this recent patent application. There must be something about patent applications that brings out the craziest language in people. For example, this is the first line of the 2009 patent application -
1. A dynamic stain glass window assembly utilizing a fixed traditional lead came stain glass window and a moveable traditional lead came stain glass window creating a moving light pattern to be displayed comprising in cooperative combination:
Maybe it would be a good idea if there were a requirement to read Strunk and White's 'Elements of Style' before applying for a patent.
December 02, 2009
Google Patents 3 - Pseudo Stained Glass or Proto-Fused Glass?
Call these "stained glass patent curiosities" - all of these either appear to look like stained glass or call themselves stained glass. Yet all of these patents seem to be for a "stained glass-like" appearance that is created with a form of melting glass into a metal matrix or fusing of the flat glass into a mold.
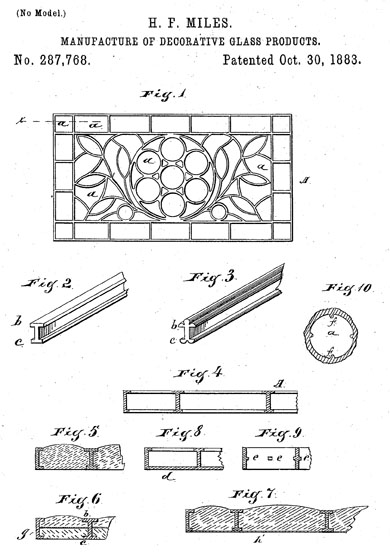
Manufacture of Decorative Glass Products,
Hollon F. Miles,
Chicago Illinois,
Patent number 287768, issued 1883
This appears to be at first glance a standard stained glass window, even in the cross sections. Only the bulging of the glass in figures 5,6,7 look unusual. In fact it is a method for melting glass into a pre-existing metal matrix. No details, like type of metal, etc. Hard to imagine this working under any circumstance, what with issues like contraction and expansion to deal with. I've never heard of or seen an example of any stained glass from that time constructed in this manner.
Manufacture of Stained Glass for Windows, etc.,
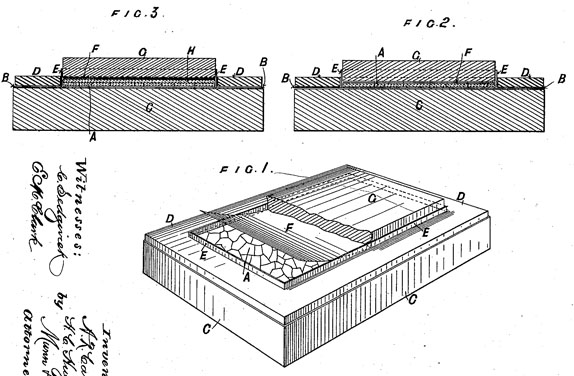
ARTHUR ROGER CARTER AND HENRY CLIFFORD HUGHES,
Patent number 477990, issued June 1892
The patent states that Arthur Roger Carter is a tobacco-manufacturer and Henry Clifford Hughes a stained glass manufacturer, both from London, England.
As far as I can tell from the arcane language, this is a straightforward fusing process, though done in a kind of mold made of platinum (used for its inoxidizabilty), mica, iron and fire-clay. There appears to be no attempt to simulate lead lines, though there is a mention of being able to fire the glass afterwards "with vitreous enamel color".
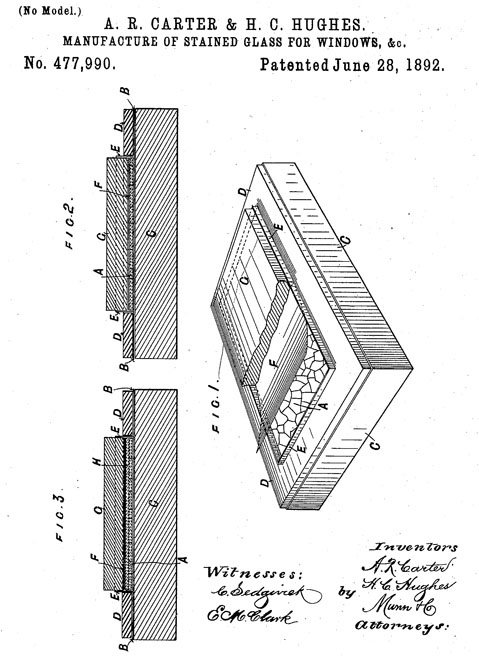
it's a little more legible sideways
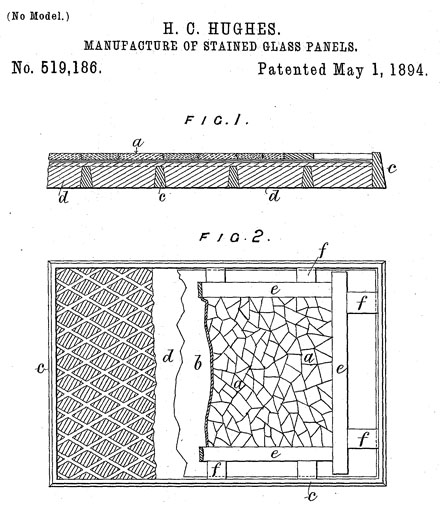
Manufacture of Stained-Glass Panels,
Henry Clifford Hughes,
Patent number 519186, issued 1894
Specifically an elaboration of the last patent, as this is the same H.C. Hughes but without the tobacco-manufacturer. Again, it still seems to be for a kind of fusing process, where pieces of glass are placed on mica (instead of platinum) and kiln fired. This patent is a little clearer in its language, though not much. The pieces of glass are laid side by side, covered with a vitreous flux, and 'welded' together, including the idea of 'pressing on the glass joints with an iron tool' while at the 'welding point'. After cooling, the piece is then painted with 'vitrifiable enamel colors' and then covered with a piece of 'white glass' (I assume he means 'clear glass' in this case) and then 'welded' again to form the final stained glass panels.
Of course, you look at these patents and it makes you think - how is this easier, cheaper, or more effective than a traditionally made stained glass window.?
Then again, it is true that these patents could be seen as about 100 years ahead of their time, just waiting for the fusing/kiln-fired flat glass movement to happen.
October 28, 2009
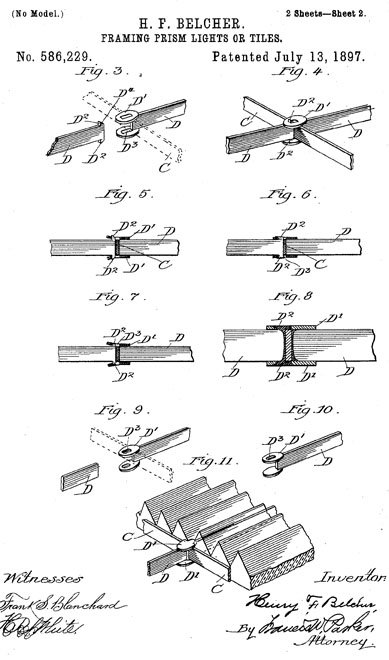
Henry F. Belcher - Google Patents
There is a thread currently on the AGG bulletin board called Belcher Mosaics. As it happens, I gathered some links about Belcher Mosaic window patents a few months ago and haven't had the time to elaborate. So this seems as good a time as any to post them, even with limited comment...
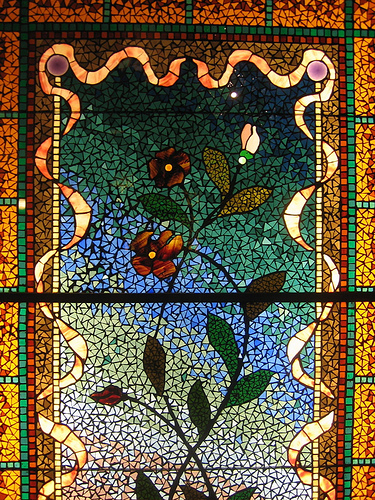
This is an example of a Belcher Mosaic window -
Located at the Smith Museum of Stained Glass in Chicago -
via Flickrite ThroughWaters
There were at least 22 different patents issued to Henry F. Belcher for his unique processes, though only 4 of them are for the Belcher Mosaic Process. All the patents can be viewed on Google Patents. Every link goes to the Google Patents page for that patent, where you can download a pdf of the full patents, just in case you are a stained glass pack rat, like me.
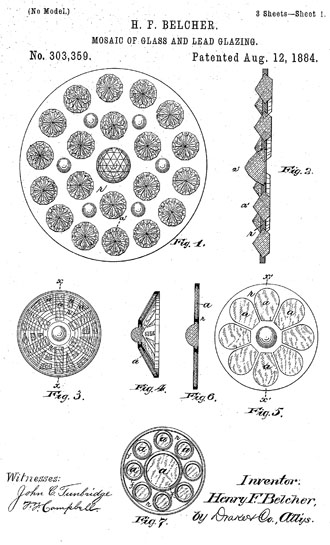
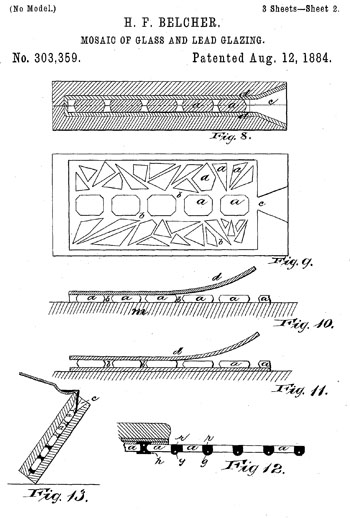
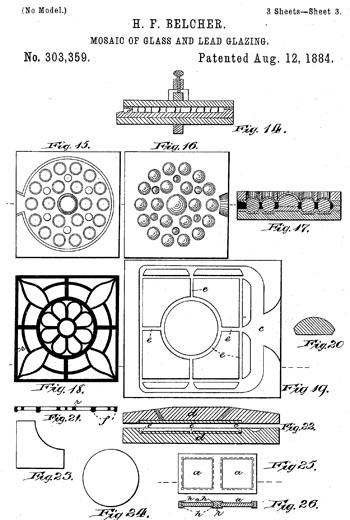
This is the earliest and the most detailed of the Mosaic patents, plus the first image from that patent -
Mosaic of Glass and Lead Glazing
Henry F. Belcher, of Irvington, New Jersey
Patent number: 303359
Filing date: Oct 21, 1883
Issue date: Aug 1884
Sheet 1 - Mosaic of Glass and Lead Glazing
More from this patent, plus the 3 other Mosaic patents, plus a bonus or two after the fold...
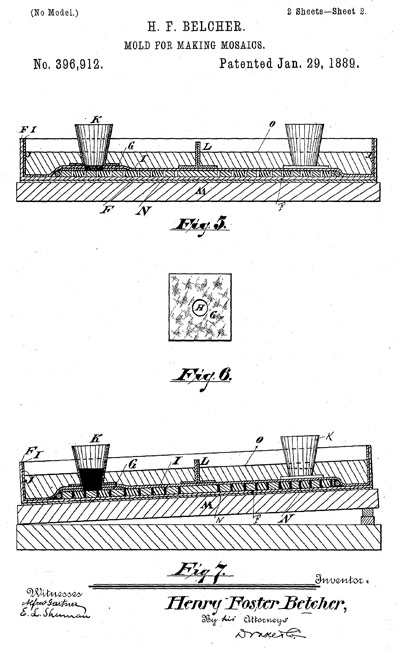
The Belcher Mosaic technique features a unique (and devilishly hard to explain) process for making stained glass windows. In this process, glass is laid out on a surface with a gap between each piece of glass. Then another surface is placed on top of it very tightly. The whole thing is placed on its side and molten lead is poured in to fill the gap between the pieces of glass, therefore binding them together. When the two layers of 'surface' are removed there is a solid panel of glass and metal. This is compared to the traditional technique of stained glass where lead came and glass must me assembled piece by piece, then the individual metal pieces are soldered at the joints, and then the gaps cemented in to form a solid panel. The Belcher technique is very much more like a 'mosaic' technique, only using glass and metal rather than tile and grout.
Sheet 2 - Mosaic of Glass and Lead Glazing
Sheet 3 - Mosaic of Glass and Lead Glazing
You can see more Belcher Mosaic windows on the webpage from the Michigan Stained Glass Census Window of the Month page for July, 2005. Barbara Krueger, of the Michigan Census, has done extensive research on Belcher Mosaic windows.
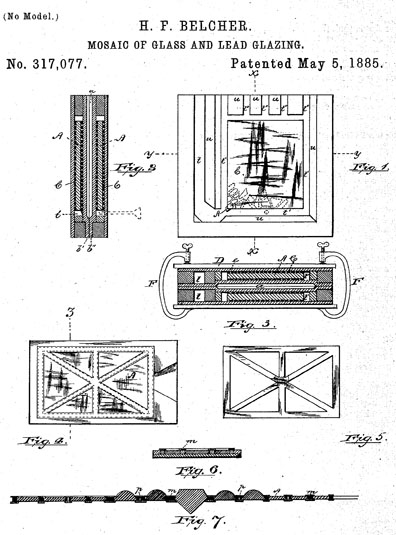
Belcher's Post-1884 Mosaic Related Patents
MOSAIC OF GLASS AND LEAD GLAZING
Henry F. Belcher
Patent number: 317077
Issue date: May 1885
Process of Making Mosaics of Glass
Henry F. Belcher
Patent number: 396911
Filing date: May 11, 1887
Issue date: Jan 1889

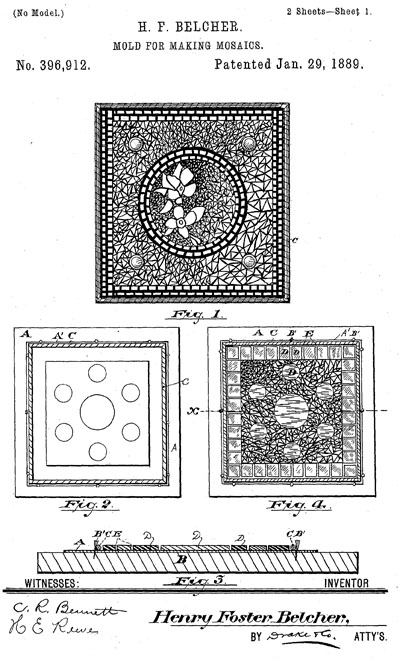
MOLD FOR MAKING MOSAICS
Henry F. Belcher
Patent number: 396912
Filing date: May 11, 1887
Issue date: Jan 1889
Sheet 1 - Mold for Making Mosaics
Sheet 2 - Mold for Making Mosaics
Belcher's Luxfer Prism Patents
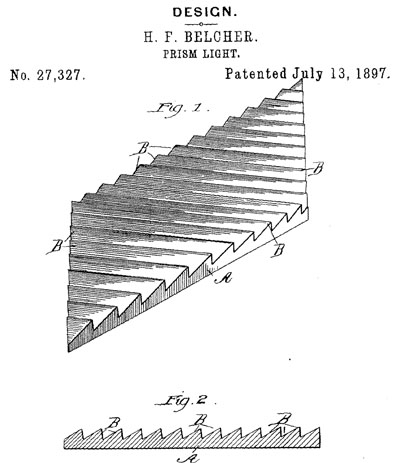
Belcher later worked for the Luxfer Prism company where he is credited with developing Prism-lights, with at least 18 Luxfer Prism related patents on Google Patents. The prism patents all boil down to 2 categories, ones that show the glass, and ones that showing framing and mounting systems.
Example of one showing the glass -
DESIGN FOR A PRISM-LIGHT
Henry F. Belcher
Patent number: D27327
Filing date: Jun 15, 1897
Issue date: 1897
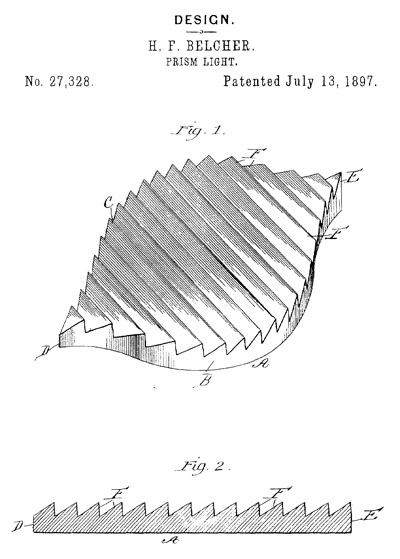
another glass variation
DESIGN FOR A PRISM-LIGHT
Henry F. Belcher
Patent number: D27328
Filing date: Jun 15, 1897
Issue date: Jul 13, 1897
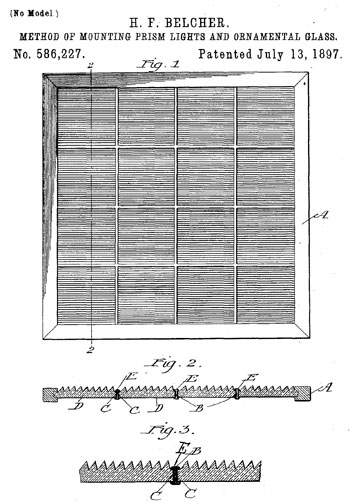
example of one showing a framing system
Method of Mounting Prism-Lights and Ornamental Glass
Henry F. Belcher
Patent number: 586227
Filing date: Apr 19, 1897
Issue date: Jul 1897
another frame/mounting variation -
FRAMING PRISM LIGHTS OR TILES
Henry F. Belcher
Patent number: 586229
Filing date: Apr 19, 1897
Issue date: Jul 13, 1897
Sheet 1 - FRAMING PRISM LIGHTS OR TILES
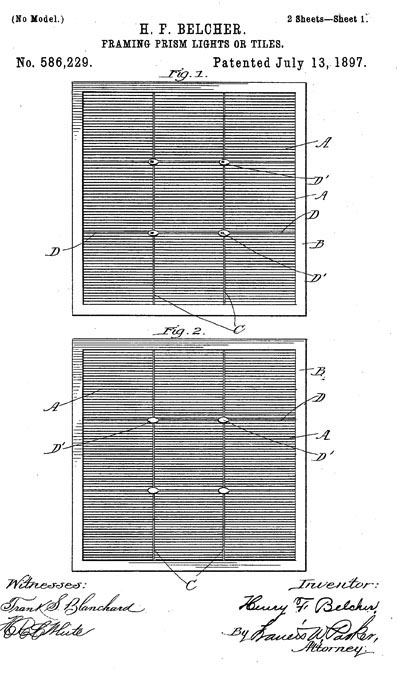
Sheet 2 - FRAMING PRISM LIGHTS OR TILES
Recent variations on Belcher Mosaic
The Belcher Mosaic window never quite caught on with the general public. Plus, they are notoriously difficult to repair/restore. Nevertheless, there have been a few patents put out since then for processes similar to the Belcher Mosiac, though I do not know if any have actually been made into windows.
This is a recent one, granted less than 10 years ago in 2000, and which cites a number of patents that are, in some ways, similar to the Belcher process.
Method for producing a metal matrix for mosaic structures
Andrew Eisan, Durham NC
Patent number: 6040065
Filing date: Dec 21, 1998
Issue date: Mar 21, 2000
The language on this one is especially obfuscating -
A method for producing a metal matrix (32) which binds inclusions (12,15) in a stable structure (31) so that the surface areas of two opposing sides of each inclusion (12,15) are visible, thus enabling translucency. This method comprises the steps of securing inclusions (12,15) to a temporary...
September 26, 2009
Euronews on Stained Glass Conservation at Cologne Cathedral
A video posted today by Euronews, centered around the conservation of stained glass at Cologne Cathedral.
At the risk of sounding like an aging curmudgeon, I'd say there is a bit of an overemphasis on the technological marvels of scientific tools and procedures. Call it "CSI: Stained Glass Unit". It makes for great TV images, but most stained glass conservation, even on great landmarks, is much more low tech and mundane.
There is a website given at the end for Constglass, which is supposed to be an acronym for "Conservation Materials for Stained Glass Windows - Assessment of Treatments, Studies on Reversibility, and Performance of Innovative Restoration Strategies and Products". What there is seems fine by me in terms of good sound conservation practices, though it is hard to tell, what with the cryptic lingo used throughout the site, as in this page called Project Methodology.
September 19, 2009
Transforming to halftone screens in Photoshop
I've posted a new video on YouTube. It's my first attempt at screencasting, which is when you record video of what you are doing on the computer screen, basically video screen capture. The video is sort of a prequel to my Thermal screenprinting post from last year.
This is the photo that is transformed. That's my Gwyneth at age 1.

This is the image as transformed to greyscale and then to various halftone screens. I first started doing this kind of transforming to halftone screen from almost the first time I used Photoshop some 17 years ago.
Click on the image for a more high resolution image to pop up.
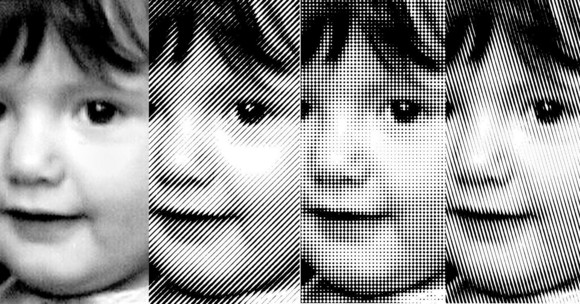
and here is the video itself -
May 10, 2009
Mary Clerkin Higgins Lecture
A talk on Stained Glass and Conservation by Mary Clerkin Higgins.
Bio as a member of board of directors of the American Glass Guild
Website, only a home page, under construction.
It's a longish presentation (roughly 1 hour, 15 minutes) and you can't see the slides very well, but it's worth it, especially if you are fairly new to working in stained glass. Roughly speaking, the 1st third is about materials and process, the 2nd third is a history of stained glass, and the last third is about conservation techniques, with examples. The information is rock solid. Mary is one of the best in the biz.
Here is the link on Truveo if it doesn't work for you here. Curiously, there is no information on date or origin of the video.
April 13, 2009
Steel Wheel Glass Cutter - Google SG Patents 1
Last weekend, as a simple afternoon diversion, I started looking up stained glass related patents on Google Patents, especially older patents from the time of the revival and boom of stained glass in America, from around 1865 to 1910.
Well, it turns out I found quite a few more interesting patents related to stained glass than I expected, so I'm splitting this into multiple parts to do it justice.
First up, the humble steel wheel glass cutter. My blog post on glass cutting provides some background on glass cutting and different types of cutters.
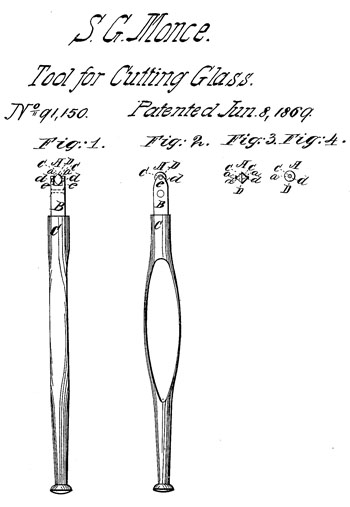
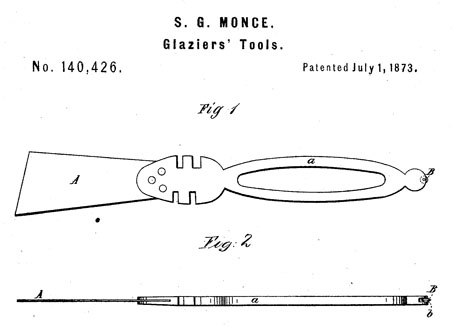
This webpage about the History of the Fletcher Terry Company mentions some patents that I could not find [update August 18, 2009 - I did find an OM Pike patent from 1868 - it's the first petent below the fold], but does mention this Samuel Monce patent from 1869 - Improvement in Tools for Cutting Glass, Samuel Monce, 1869.
This is the earliest one I found and it fits in well with the Fletcher Terry page. Not too far from the basic tool we see today, though with a wider shaped bone handle and a wider steel wheel.
more patents with a little comment in the full post...
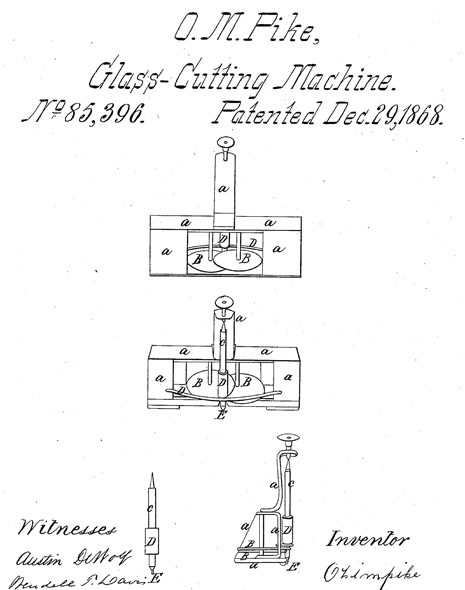
[update - early patent, though seemingly and curiously pre-steel wheel -
IMPROVED MACHINE FOR CUTTING VITREOUS SURFACES
patent # 85396, issued to Ozi M. Pike, Dec 29, 1868]
Improvement in Glazier's Tools, Samuel G. Monce, Bristol, Connecticut, 1870
Earliest multitasking steel wheel cutter? First appearance of the grozing 'teeth'. I doubt this ever went into production. I've certainly never seen anything like it.
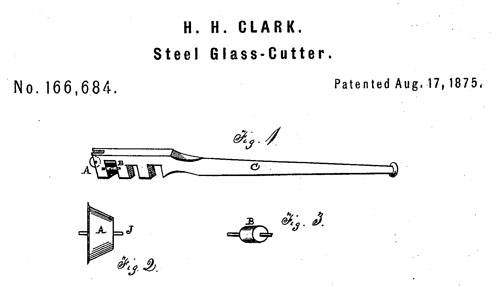
Improvement in Steel Glass-Cutters, by Henry Clarke, Washington DC, 1875
The handle looks close to what we have today, with the grozing 'teeth' up close to the wheel, but the steel wheel is still much wider.
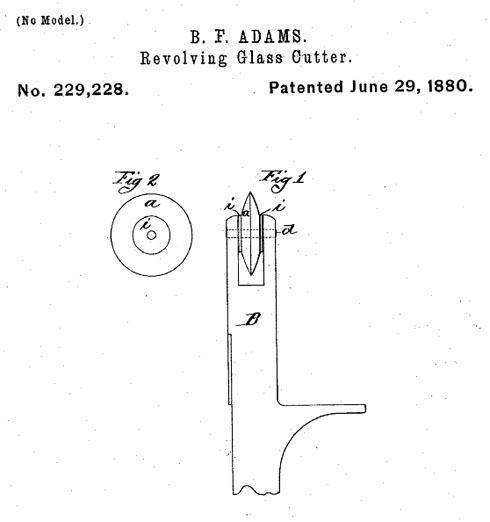
Revolving Glass Cutter, 1880, by B.F. Adams, Springfield, Massachusetts.
This is what the profile of most steel wheels on glass cutters looks like to this day.
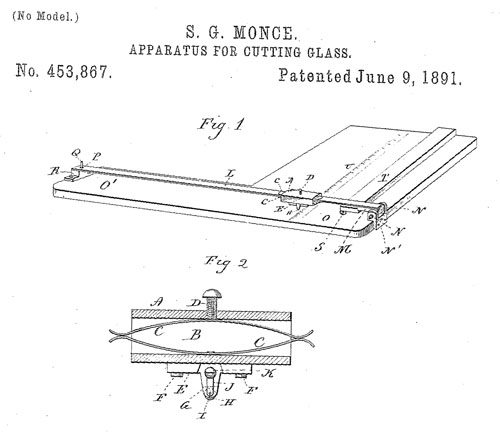
Apparatus for Cutting Glass, Samuel Monce, 1890
This looks to be a cutting jig for cutting straight lines and strips. I've built a few of these for my studio and others, but never with this kind of springy mechanism.
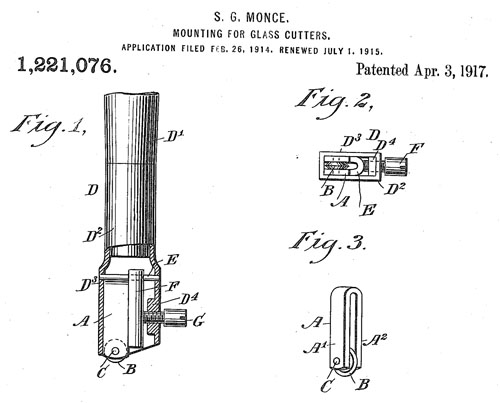
Mounting for Glass Cutters, Samuel Monce, 1917
After the basic shape of the wheel was figured out, most patents after this seem to focus on mechanisms for making the wheel changeable, so it can be replaced firmly and easily after it's worn out.
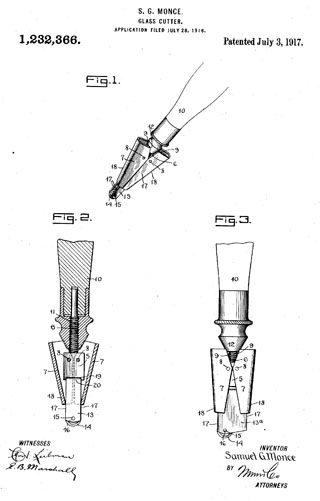
Glass Cutter, Samuel Monce 1917
Pretty wacky looking head fro a glass cutter. I'm not quite sure what the purpose is for the odd shape.
If you are interested in more recent oddball cutters that never made it to market, look at this one that bizarrely rethinks how to cut glass, and this one that turns a standard cutter into a pistol grip, and this one that puts a big knob around a standard cutter, and this convoluted constant pressure cutter.
February 04, 2009
One BIG Rondel
Video showing the making of a 3 foot diameter rondel, by Skeels Glass.
via keithorr YouTube Channel
part 1 - gathering and forming a bubble (3:18)
part 2 - the rondel takes shape and is lifted off (5:26)
text from the YouTube page -
Total working time was 3 hours per rondel.
Rondels were either 36 inch (70 pounds) or 48 inch (105 pounds) with a thickness from 4 inches at the center nub to 3/4 inch at the edge. Rondels were made over-sized and trimmed to diameter using standard glass cutter and large breaking pliers.
Rondels made one layer of a dual glazed unit. Finished units are installed in the Mount Timpanogos Utah Temple of the Church of Latter Day Saints.
January 27, 2009
Fremont Glass on YouTube
Fremont Glass Co. - out of Seattle WA (no website but I found some company info)
Good video footage of a smaller shop producing cylinder process sheet glass.
Another video where it's best to just turn the sound off. Great images, but no narration, no live sound, just cheesy music.
video via YouTuber Siuco
Fremont makes some beautiful glass, with rich vibrant colors. I haven't used it so much because I find it a little iffy if you need to refire it, making it limited for use in painting or fire polishing.
Fremont is one of only two shops in the USA making sheet glass by this method. The other is Blenko Glass Co., in West Virginia. Blenko is a bigger shop with slightly different methods. They do have a Making of Blenko video on their website, but it only shows the making of a bowl. Nothing on their flat glass making, but you do get the sense of how much bigger Blenko is and how the team works differently because if it.
January 25, 2009
Xpresscreen YouTube Channel
An update to last November's post on Thermal Screenprinting - Xpresscreen has started an Xpresscreen YouTube channel and posted their own video demo of the Xpresscreen XEF913 Exposure Unit. It runs a little over 5 minutes. I've added it into the original post as well.
'Xpresscreen' -
January 24, 2009
Uroboros Glass on YouTube
Another sheet glass manufacturer jumps on the YouTube bandwagon - Uroboros Glass now has a UroborosGlass YouTube channel.
Their first video is a 10 minute promotional video. Mostly photomontage with some fascinating, though all too brief, video clips of the sheet glass making process. Uroboros makes some of the best hand rolled sheet glass and you just see a tiny glimpse of how different that process is as compared to the machine rolled processes from Kokomo or Wissmach.
My advice - turn the sound off. There is no narration and some of the soundtrack is truly grating, at least to my ears. I'm just no big fan of cheesy techno music.
The World of Uroboros Glass -
January 23, 2009
Glashütte Lamberts YouTube Channel
Since I posted the Lamberts' Cylinder Glass Demo last November, Glashütte Lamberts started their own glashüttelamberts YouTube channel.
They have one video up showing their cylinder glass process. It's a shorter variant on the one I posted a month ago, this time without narration.
All of the other videos so far are short videos (30-40 seconds) showing a single sheet of glass moving around in a lit space, so you can see the texture and see the glass in reflected and transmitted light.
for example -
Tafel 25 | Überfangglas - that is, flashed glass.
Nice.
January 14, 2009
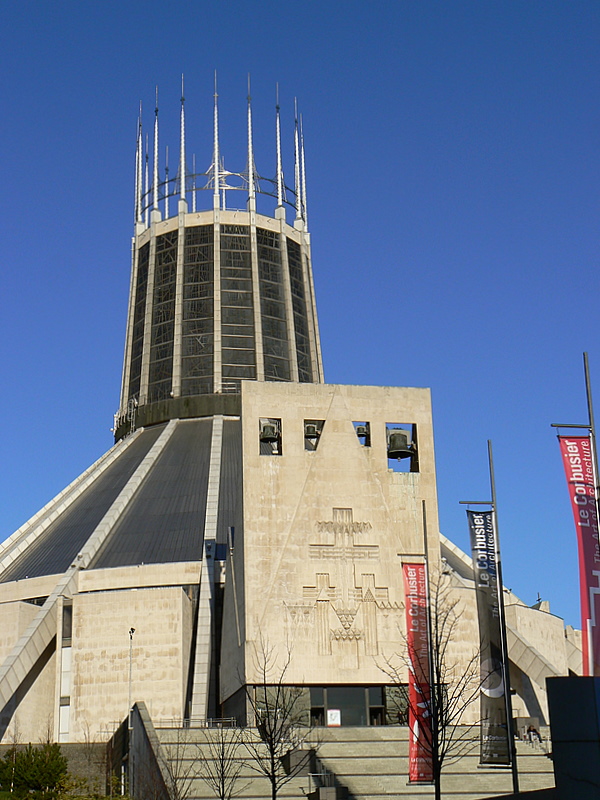
Crown of Glass - Liverpool Metropolitan Cathedral
Another find on YouTube - and it's the testament of another big commission.
Part 1 of 2 of a 15 minute film from 1967 called Crown of Glass, produced by Shell Film, about the making of the stained glass 'Crown' for Liverpool Metropolitan Cathedral, which is the Roman Catholic Cathedral in Liverpool, England. The stained glass was designed by John Piper and fabricated by Patrick Reyntiens.
A bit of a relic, as an example of 60's industrial documentary filmmaking, but here goes ...
To get a better sense of what it actually looks like, here is an image of the 'Crown' from one angle by flickrite 'stephen_dedalus' -
Part 2 of the video, many more flickr images and a curious recent occurence, with comments, after the fold ...
Crown of Glass - The Film
part 2 of 2 -
The film seems to be in rough shape. Shell Film made some pretty stylized documentaries, but I wouldn't be surprised if the curious yellow/orange glow throughout the film is due more to fugitive film stock from the 1960's, and for sure it looks like this print has gone through several rounds of copies. Nevertheless, it is a rare look at Piper and Reyntiens in their heyday, and all the process footage is invaluable for stained glass historians (not to mention future conservators).
Curiously, the Liverpool Metropolitan Cathedral website does not appear to mention Piper or Reyntiens, at least in it's Flashy Tour of the Cathedral. Though the tour does mention many other artistic works in the Cathedral, with full credit to the artists involved. It's rare for a church website to do this, and makes it all the more odd to leave out Piper and Reytiens.
In the Top Ten?
I should note that this building was recently named by the editors at virtualtourist.com as one of the top ten ugliest buildings in the world. Though the text acknowledges that the interior is perhaps not too bad -
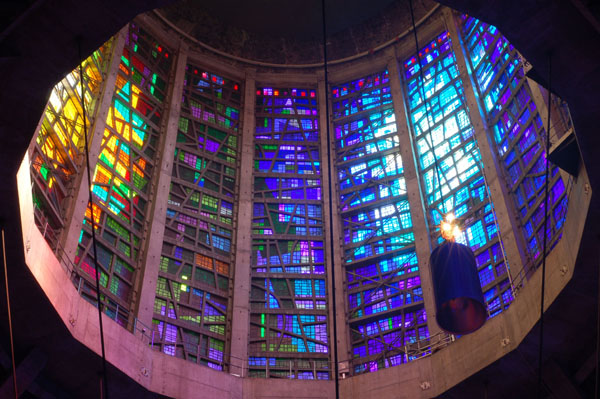
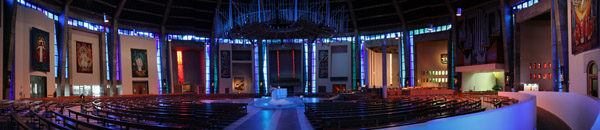
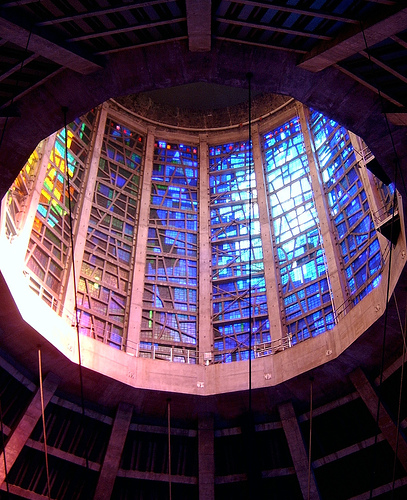
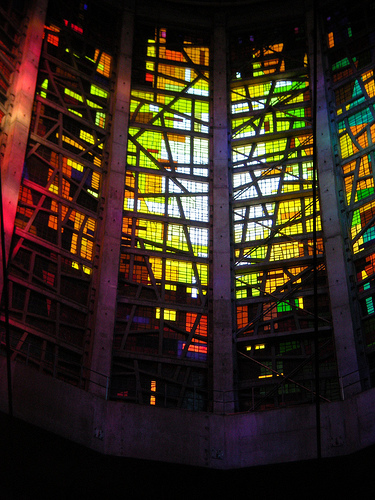
The people who work here must be so sick of the space capsule jokes. Even those who find the buildings shell a little, well, spacey, have to admit the buildings circular interior is pretty spectacular.
Panoramic Interior Shot by 'ahisgett'
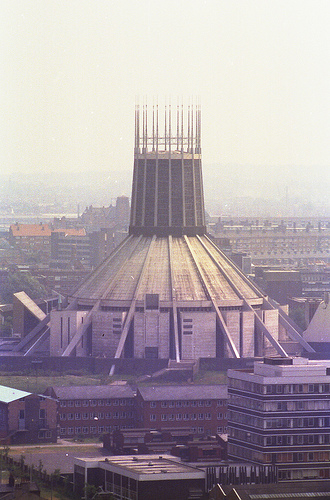
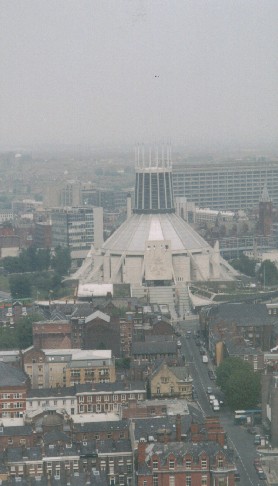
Even if some consider this an ugly building, there is no doubt it is a very much photographed building, according to Flickr.
This is from just a quick search, decide for yourself ...
The spaceship aspect from 'Geoff_B'
View from the Anglican Cathedral from 'Catherine_Sparks'
Daylight from Yoshef

Another daylight piece, this time from 'smohundro'
Exterior by 'romeo66'
here's the modern cathedral right out of an Orson Welles movie.

Exterior at night from 'rob the tog'

Interior shots - from the flickrsets -
A good Liverpool's Metropolitan Cathedral flickrset by tony stanley -

another flickrset called Liverpool Catholic Cathedral by 'jstevew' -
and a Liverpool flickrset with some closeup shots from tortipede -
In all, for me, this is more a case of "ugly is in the eye of the beholder". The more I see the images on flickr, the more I like this building.
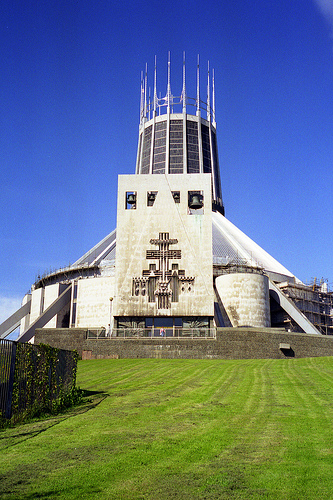
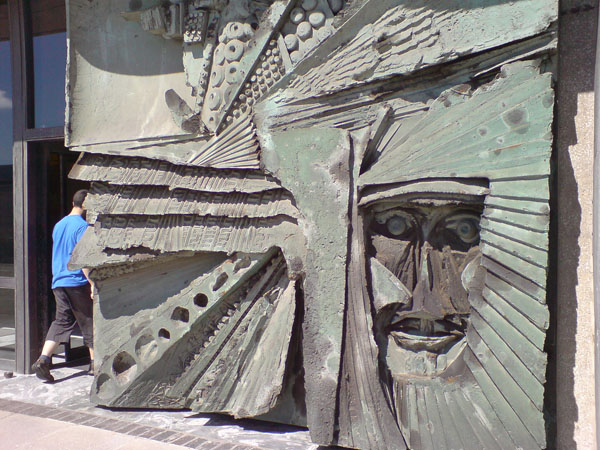
For instance, I like the crazy entrance.
Relief sculpture at the entrance - via 'that_james'
As much as I tend to really not like stark poured concrete walls, it works here when mixed with the modernist art and the play of colors from the stained glass - via 'ian-S'
Longevity Question - Technical
Seeing that this is definitely a case of visionary architecture trumps practical construction, I wonder about the longevity of this building. Modernist buildings, generally, don't age well. Modernist architects were never good at thinking of the long view of things.
I've seen one reference to there being a problem with leaks. Frankly, looking at the film and knowing what I do know about the fabrication techniques, I'd be more surprised if the 'Crown' itself didn't leak. I'd be curious to hear the story of how well the building is holding up after 40+ years. I'll post updates if I hear anything.
And one other thought as a postscript, for those purely interested in the technical processes of stained glass- I've not ever heard of anyone else using fiberglass threads to 'reinforce' faceted glass/Dalle-de-Verre. Did this really help in giving the panels added strength? Have any other studios followed suit and used this procedure? I haven't heard of any other studios doing this and I find it a little hard to believe the fiberglass strings would add much structural support.
Other opinions welcome, of course.
Postscript - For general interest in the stained glass of Piper and Reytiens, there is a very good Flickr group devoted entirely to the work of Piper/Reytiens. Lots of great stuff here.
January 03, 2009
How It's Made - Opalescent Glass
More on opalescent glass and the machine rolled sheet glass process. Finally found a video, though it may not stay up long on YouTube. It's from a program called "How It's Made", produced in Canada, and being shown in the USA on the Discovery Channel. Enjoy it while you can...
Though it's not mentioned in the program, the glass is being made at Kokomo Opalescent Glass, out of Kokomo, Indiana. You can tell by comparing it to the pages from the Kokomo "Tour The Factory" pages.
On Flickr, I found a very nice Factory Tour flickrset by 'annamaren'. Also, this group of photos tagged 'Kokomo Opalescent Glass Factory' from 'emaho', including this great shot of the tableman in action.

January 02, 2009
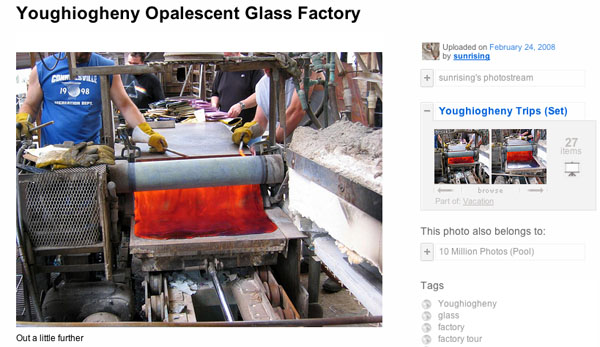
Youghiogheny Glass Making
Check out the Youghiogheny Trips Flickrset by 'sunrising' showing the process of rolled glass sheet making at the Youghiogheny Glass Company.
There are 12 pictures in sequence showing the creation of one sheet of glass, with this screenshot representing number 7 in the sequence.
November 28, 2008
Float Glass Video 2
As the float glass video I embedded in April is no longer available (such are the vagaries of YouTube), I found another video that shows the float glass process. This is a more schematical industrial video, with little diagrams and descriptive animation.
Deep Thought
This is a massively complicated process for obtaining a particularly plain looking type of glass.
November 23, 2008
Tools of the Trade 2 - Screen Printing
These days, most of my 'tracing' is done via screenprinting.
A recently finished project - while in the wax-up stage.
Lots of pictures, a few videos and a description of how I do screen printing on stained glass follows below the fold...
My Intro to Thermal Screen Printing - Print Gocco
I started screenprinting in 1992.
At that time, I was doing a number of drawings for stained glass by using an opaque marker on acetate. I liked the feel of it and I liked the look. But I was frustrated that I could not achieve the same look by tracing with a brush onto glass. Around that same time I took a screenprinting course at the Museum School in Boston, while I was first learning to use computer graphic programs.
It also helped that at the Museum School, screenprinting was taught as monoprinting - which is to say, not as a way to produce multiples but as a unique method of applying an image to paper. With some experimentation, I found I could translate the look of the drawings onto glass via photo emulsion screenprinting. Still, it was hard to justify the amount of time to make a screen via photo emulsion when you were only using that screen for one or at most a few pieces of glass within a panel.
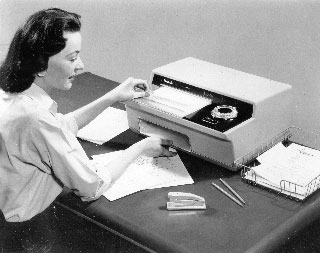
I'd heard from a friend of something called Print Gocco. , which is a little machine where you made a screen and then made prints on the same machine. I wondered if I could use Gocco only to make screens, and to use those screens to print on glass.
This was my first full panel incorporating screenprinted pieces with screens made using the Print Gocco thermal screen making equipment.
Arabesque #1, 8.375" x 9.375", 1992
I could never have achieved the look of these pen drawn lines by using a brush on glass.
This video shows how Print Gocco works. The screenmaking part is covered in the first 2 minutes.
I soon learned there are serious limitations to using Gocco, for my work at least. One limitation is size, the screen area is only about 3" x 5". Then there is the cost. At the time I was doing it (early 90's), the cost was about $4-5 per 3" x 5" of screen area. That's not terrible for someone doing a holiday card or invitation, but the way I use screenprinting I will make anywhere from 10-30 screens for a single window (for example, the Shakespeare window needed about 25 screens). Gocco would be cost prohibitive, even if it were big enough.
At this point in time, it's all kind of a moot point, since Print Gocco has officially been discontinued by Riso, the company that made it. Screen material will still be available, but not the Gocco machines or bulbs or printing supplies.
Thermal Screen Printing - ThermoFax
Thermofax is an old copier technology.
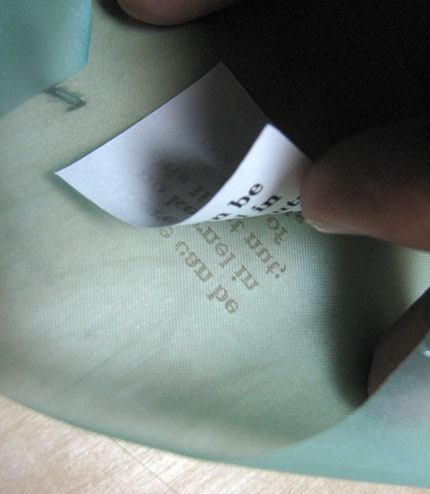
Thermofax technology is currently being kept alive, oddly enough, by tattoo parlors. This is a short video (0:41) showing how tattoo parlors use Thermofax technology, transferring a design from paper to arm using 'spirit masters'.
Aside from the spirit master, thermofax machines can also process a lower mesh count version of the same screen material as in the Print Gocco.
Thermal Screenprinting has been embraced by the quilting and fabric art community - as seen here in a Flickr image for Thermal Screenprinting.
Using a Thermofax machine to make screens is a workaround and in general it's tricky and temperamental, compared to the official methods of making screens. A Thermofax needs to warm up. Settings on the dial can vary widely. The heat/light intensity gradually weakens over time. I had a Thermofax for several years, and eventually, toward the end of it's life, I would have to run several sheets through to warm it up and also run a screen through more than once to fully process the screen.
There is a new version of the thermofax on the market, a German machine referred to as a Thermal Copier. I have yet to try one of these. But they are being sold in the US now through Marlene Watson and through Welsh Products.
The new thermal copiers.
[update February 22, 2011 - a following is a YouTube video demonstration of the Panenka Thermal Copier, in German and English. The bulk of the thermofax info is in the first half, though the second half does give an interesting show of just how precise and specific the Germans can be in doing something as simple as placing tape on a frame. Bless em.]
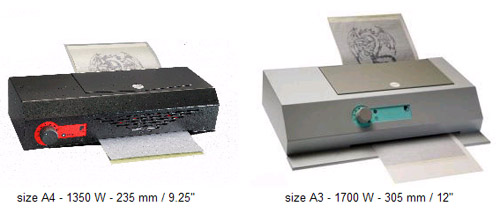
Thermal Screen Printing - Screenfax
The Screenfax is a machine made by the same people who made Print Gocco. It uses Xenon bulbs to flash the screen in a way similar to the photo bulbs in the Print Gocco, only more reliably and efficiently.
It will make a screen at much lower per square foot cost compared to Print Gocco. Unlike the Thermofax, it will process screens of a much higher mesh count, allowing for much finer detail. With this machine you can even do larger screens, by flashing, moving the artwork, and flashing again.
This was officially marketed as the Xpresscreen XEF913 Exposure Unit, though it's the same thing as the SP-180, made by the Riso Corp in Japan.
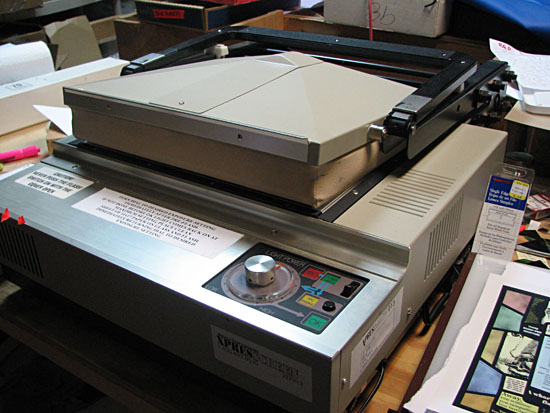
Screens and cut-out laser prints placed on the imaging area ready for the flashing.

The finished screen peels off the paper if exposed properly.
and a video of me making a small screen...
[update January 24, 2009 - I just discovered the following Xpresscreen video on YouTube, which was posted just a few days after my original thermal screenprint entry - So, here is Xpresscreen's own demo of the Xpresscreen XEF913 Exposure Unit - added Jan. 24, 2009]
'Xpresscreen' -
On a final note - one question I get all the time. Isn't there anything else will process the screens? Something cheaper or easier to find? Could you use a laminator or even a clothes iron? The simple answer is no, these are the only ways at this time to make a screen using the thermal screen material. I've been using this process for 15 years and I haven't heard of any cheaper or easier alternative. There is some inkling of a direct computer-to-screen screenmaker, but I haven't seen it yet and it will certainly be at least as expensive as any of the options today.
[update - Jan 24, 2009 - The Xpresscreen YouTube channel also has a video demonstrating the new direct to screen machine. Worth checking out though it doesn't appear to be the same process as the Riso machines, though it's hard to tell from the video. The machine is bigger than I expected and subsequently I can only expect it to be very expensive]
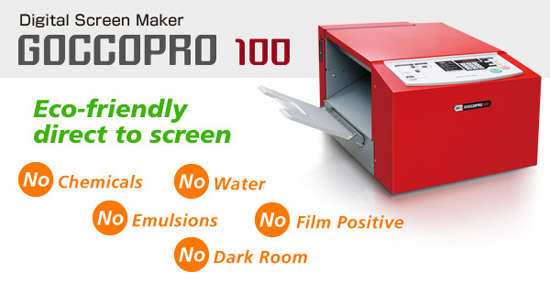
[update February 22, 2011 - There is a new Gocco Machine on the horizon. Via a post about thermofax by Guenther Panenka comes news of a new venture by Riso called GoccoPro 100, a new "digital direct-to-screen" screenmaker. Due out the spring of 2011, it is expensive (Panenka quotes it at precisely $14,383 US dollars), but intriguing. A promo picture below...]
Screening the Paint onto the Glass
At this point the screenprinting on to glass is the same as in screening on any other surface.
With small one-off pieces (most of what I do) I usually just tape the screen to the surface. I've talked to some screen-printers who are horrified that I don't mount the screen in a frame and and set the proper tension and screen it 'off contact', etc, etc. Xpresscreen does have a method for stretching the screen and working off-contact, and it works well. But most times, for what I'm doing, it's just not needed. I can achieve the result I want this way just fine. It's important to remember I am not doing this to make many multiple images that are exactly the same.  .
.
I'm usually only making one or two 'prints' off a given screen. The consistency of the paint is always more important than all the fiddling with the screen.
I use Reusche traditional vitreous glass paints. In this case I've used pre-mixed lead free tracing black mixed with D882 Oil medium. Oil has several advantages over water based media. It dries to a hard smooth texture which you can scratch into to fix lines. Also, you can treat it like scratchboard and scratch white lines into it.
The tools are simple and basic. A palette knife to do the final mix of the paint for the proper consistency, a plastic spackling knife used as a squeegee (on larger pieces I use a standard screenprint squeegee), and a handy brush to touch up pieces as needed.
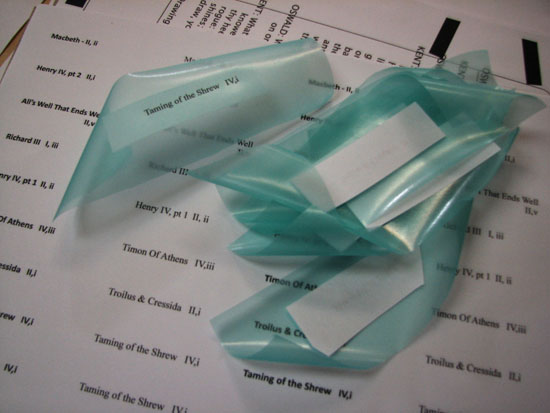
This is just after screening the Shakespeare face section, showing the simple set of tools needed -

A pile of little screens ready for printing.
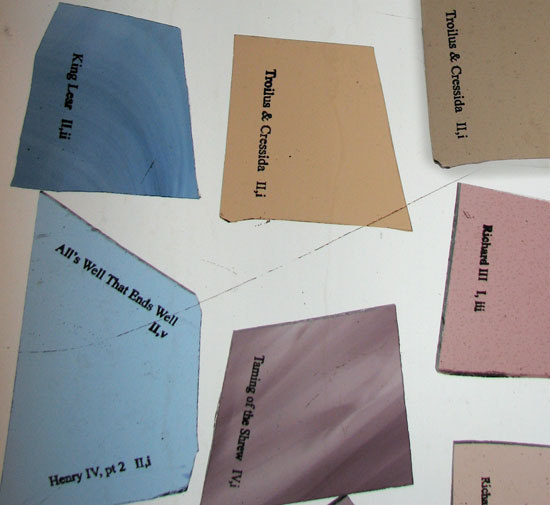
The same names after screening and before firing.
Being traditional glass paints, the pieces are fired in a kiln to about 1250 degrees fahrenheit. After firing, the paint is permanently fixed in the glass.
November 10, 2008
Vitrail et Vitraux Video
Another YouTube video with some footage of making sheet glass using the cylinder method. The first 3 minutes has the footage on the sheet glass manufacture - interesting contrast to the German manufacture.
The rest of the video is more talk than anything else, and in French. There is some footage of assembly, but not much else.
November 09, 2008
The Art of Making Glass - Lambert's
I've started a channel on YouTube called VitreosityInMotion for the various stained glass videos I might come across or make. No set plans right now, but many ideas...
This is the first video I've posted. It's called The Art of Making Glass - a promotional video that I received from S.A. Bendheim Glass at the 2004 SGAA conference. Seeing that I hardly ever make a panel that does not use Lambert's glass, I didn't think they would mind me posting it. The video shows the various stages of the cylinder method of making sheet glass.
Here's part 1, embedded -
part 2 - deals with flashed glass and shows the flattening process
part 3 - deals with making rondels and restoration glass
July 30, 2008
The Nature of Glass Disputed
Kenneth Chang of the New York Times has an interesting article about disagreements in the scientific community about the Nature of Glass. I can't say I'm able to follow much of it, but it is still a fun read with terms like 'ideal glass' and 'dynamical heterogeneity'.
And do also check out the rather curious tale of Buzz Aldrin's Flashlight.
June 12, 2008
Tools of the Trade 1 - Glass Cutting
A new feature showing off the tools of the stained glass trade. Nothing comprehensive, just a description of how I use them myself and some comments on how the tools are changing (or not) within the current workplace.
First up, glass cutting tools.
My current glass cutting tools -
Glass Cutters
Glass cutters I have on hand.
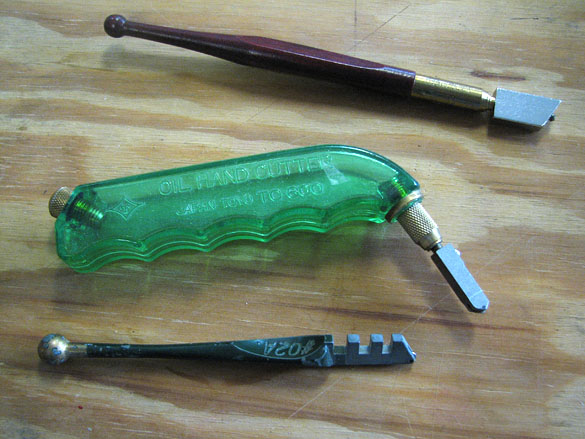
At the top is a diamond cutter, in the middle is a Toyo carbide wheel pistol grip cutter, and at the bottom is a Fletcher-Terry steel wheel cutter.
All of these cutters work on the same principle. The cutter is used to 'score' the glass, after which an opposing pressure is applied to run that score through to the other side to make an accurate 'cut'. For more detailed info on how glass cutting works, there is a good 'fundamentals of glass cutting' page on the Fletcher-Terry website.
Diamond Cutter Detail
Diamond cutters are still the European standard, but rarely used in the USA. Indeed, these cutters are almost impossible to find in the USA. I was given this one some years ago by a Scottish friend and colleague but still haven't quite figured how to use it. I do use it sometimes for a good deep score on a tough-to-cut piece of glass, like cutting apart a bottle.
Fletcher steel wheel detail
This was my standard brand of cutter for many years and is the one used most by professional studios. They come in different styles with straight or ball ends (ball ends for tapping a score) and with larger or smaller wheels (smaller wheels for more intricate cuts). Fletcher also makes carbide cutters in this form and in self-oiling 'stick' and pistol grip forms.
The Fletcher cutters never held up for me and I remember having to go through several in a jar to find 'the good one'. The cutters would have one 'feel' when they were fresh out of the package, then another as they were broken in and eventually they would develop the dreaded skipping score, that meant the cutter was toast. In my experience, a standard fletcher cutter would last in a professional setting anywhere from 1-6 months.
So, IMHO, Fletcher cutters are good basic cutters, cheap and easy to find - but too fussy for my taste.
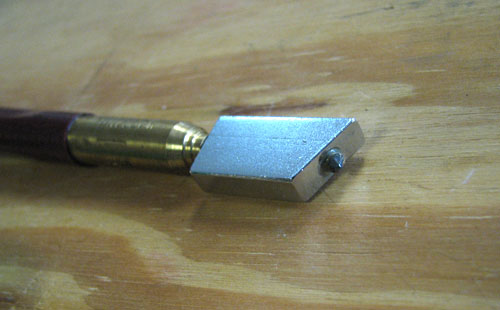
Toyo cutter detail
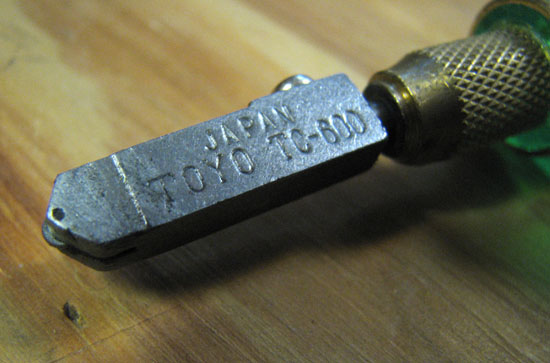
I never even saw a pistol grip cutter until I was working professionally for perhaps ten years. I began using the Toyo when I was doing a lot of strip cutting while making quarry panels. It was easier and more reliable in making long straight cuts. Gradually, I came to use the pistol grip for pattern cutting as well. Now it's my main cutter. It will last for a remarkably long time, which is good because it's not cheap (approx. $35-40 USD retail compared to about $4-7 for a standard Fletcher cutter). Most Toyo cutters will last 1-3 years, and that's without changing the cutter head. Note that you should never ever use the plastic part for tapping the glass like the ball end of a Fletcher, it will eventually break the plastic. I know this from personal experience.
Some professionals will scoff at the notion of using a pistol grip cutter, and many will suggest that it's only for amateurs. Studios can be quite fussy about what type of cutter you use and how you use it. I've never understood this. As long as you cut accurately (even better - quickly and accurately), then what difference does it make what cutter you use or how you use it?
Similarly, even when I did use a Fletcher cutter, I was considered an unconventional glass cutter by some because I was a 'push' cutter rather than a 'pull' cutter. That is, I pushed the cutter away from me rather than pulled it toward me while cutting. With the Toyo, I'm a 'pull' cutter when cutting on a jig and a 'push' cutter when cutting using a pattern.
A few tips re: the Toyo -
1) The handle is a reservoir for lubricant. There are many types of cutting lubricants available, most of them oil-based. I use a thin oil-based lubricant (called Liquid Wrench) but only a small amount (about a tablespoon) at any one time. Putting in any more tends to let out too much of the lubricant while cutting.
2) The Toyo is also available with a wide head for strip cutting. I find the standard head works better for both pattern and strip cutting.
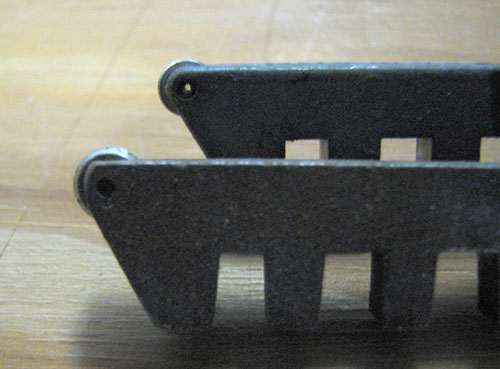
Glass Pliers
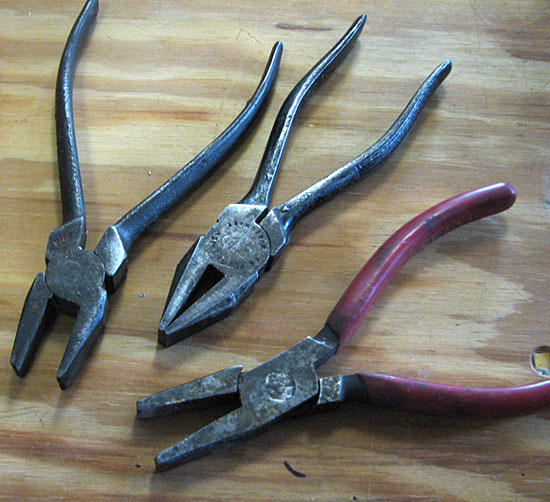
These are non-serrated Knipex glass breaking pliers and at bottom, a pair of Knipex flat nose grozing pliers. I don't like serrated pliers for breaking or grozing, nor do I like pliers that attempt to be a combination breaking/grozing plier.
Some people like to use running pliers, which are pliers that have a curved face so you can apply pressure on both sides of the score while squeezing the pliers. I never use running pliers, not even for long straight cuts.
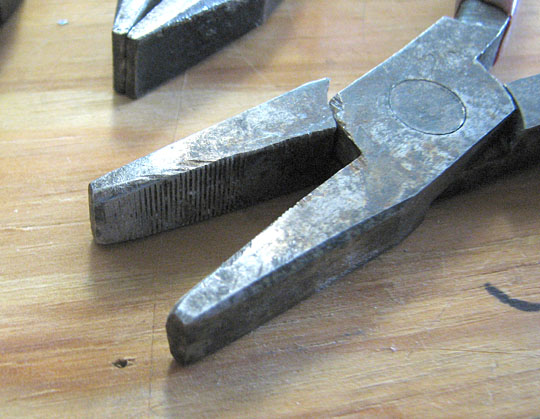
Grozing is where you nibble away the extraneous bits after making the basic cuts. Itt's also where you nibble into an inside curve and can be used (usually during assembly) to make the piece smaller if initially cut too big. Grozing pliers are probably the most individualistic of all cutting tools in terms of preference. The image shows how I like my grozing pliers. Soft metal flat nose Knipex grozing pliers when the slight serration inside wears off and there is a just enough wear on the edges to round the corners, not too little, not too much. This pair is at the early stage of how I like it.
Cutters can be extremely fussy about their grozing pliers. I suppose it has to do with the fact that so much of grozing has to do with feeling the glass being broken away. Some like brand new pliers, while others will only use very well worn pliers. The most commercially available grozers are serrated and have a small space between the blades, while the ones I use are flat and the blades meet flush. I've heard of some who have heated and tempered pliers and some who have ground down the blades to make them 'pre-worn'. I worked at one studio where they fashioned their own grozing pliers by welding 2 pieces of 3/8" flat rebar on to the end of lineman's pliers. They sort of looked like duck-billed grozers. To each his own.
Jigs
This is my mini-strip cutting jig. Mostly used for borders for small panels.
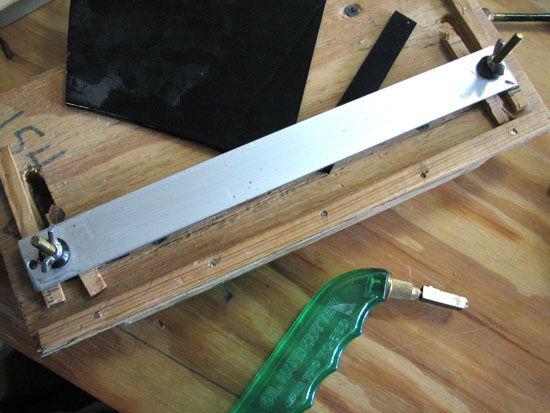
I started making strip cutting jigs when I was doing Quarry panels, as in the panel Four Women. I am totally sold on jigs for strip cutting because they add speed and are far more accurate if used properly. This mini strip-cutting jig gets a good deal of use considering it only does one thing. I've made ones to accomodate full sheet size but don't have one in the shop right now.
I've used a few different circle cutters over the years. The Fletcher circle/oval cutter is good and accurate but expensive (approx 135 USD). I have an Inland that serves my meager circle cutting needs.
I've never tried commercially available jigs nor have I used any kind of glass cutting 'system', like the Morton system. I've heard of a few people who swear by them but I've never seen a professional studio use one and from the descriptions I don't see the advantage. Who knows - maybe I could be swayed some day.
Glass Routers, Grinders, Saws, etc
Grinders, routers and saws have only been commercially available for the stained glass studio for about 30 years or so. They are another of the tools developed for the hobby trade that many professional studios have slowly (and sometimes only grudgingly) adopted in their studios. I do have an Inland grinder which I use for close fitting on copperfoil pieces since I like thin lines when working in copperfoil. I hardly ever use the router when cutting for lead came panels. These days I use the router as much for engraving flashed glass as for helping in cutting.
I have used various bandsaws and ring saws in different studios over the years, but don't have one in my studio. At this point in my work, I don't tend to incorporate deep inside curve cuts and the like, so I really don't have the need.
I've never worked in a studio that used a laser or water jet cutter for stained glass work. For the vast majority of studios the capitol expense is simply not justified, and the limitaitions of these high volume production cutters is not acceptable. I've nothing against them, but I don't see much of a future for them in most stained glass studios unless they come in smaller, cheaper and more flexible packages.
Useful Sundry Items for a Dangerous Art
Don't forget those safety glasses!
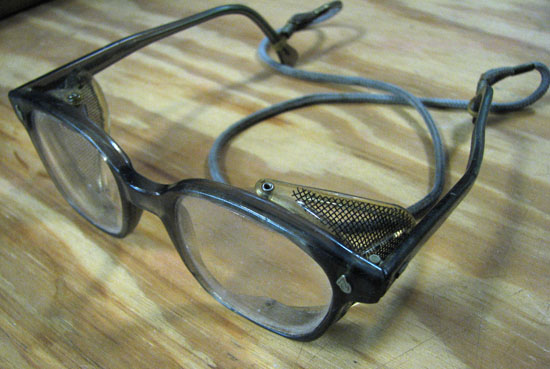
I'm not too picky about the type of glasses, but the lanyard is important. Before I got the lanyard, I would take the glasses off while concentrating on what glass color was needed next, then when I was ready to cut I couldn't find the glasses. Over the years, the lanyard has saved me hours of frustrated searching.
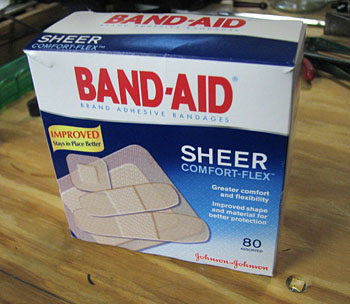
I'm generally not one to over-do the brand loyalty thing - but let's face it, Band-Aid brand rules.
April 18, 2008
Verriere de St. Just Videos
Videos related to the Cylinder Process of making hand blown sheets of glass.
I wasn't able to embed these videos, so they may or may not work when you click on the link. It should open windows media player and play within that.
The first video shows the process for Basic Hand Blown Cylinder Glass.
The second video covers the techniques for making specialty glass, like
Dalle De Verre, Crackle Glass, Hammered, Reamy, Flashed Glass and Streaky Glass.
The other early process, which I wish I could find a video of, is the Broad Sheet Process. The broad sheet is similar to the cylinder method, except that in broad sheet the cylinder is smaller and is split and flattened while still hot.
April 16, 2008
Crown Glass Videos
A video demonstrating the making of 'Crown Glass', likely the most ancient method of making 'sheets' of flat glass.
The most surprising part of this is the shape of the piece just before 'spinning out'. I would have thought it to be rounder rather than so flat. Interesting.
The video comes from the anthropologist and historian Alan Macfarlane whose studies include the study of materials and how they affect the development of societies. The Alan Macfarlane website includes videos showcasing the impact of glass spectacles and glass windows on the development of western society, and there are even more glass related videos on his youtube area under the avatar ayabaya.
A few more crown glass related bits and pieces below the fold...
Crown Glass Images
The following images are from a PDF file on 'Industrial Vernacular'. I put them up here mainly to show how much larger crown glass can be. I've heard of them up to 4 feet in diameter, with most being around 3 feet in diameter.
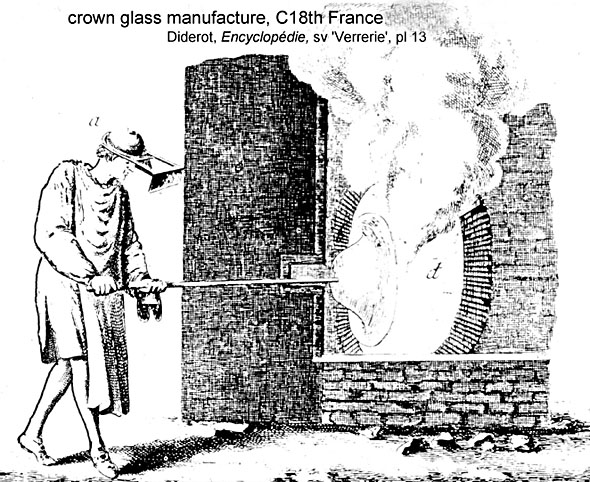

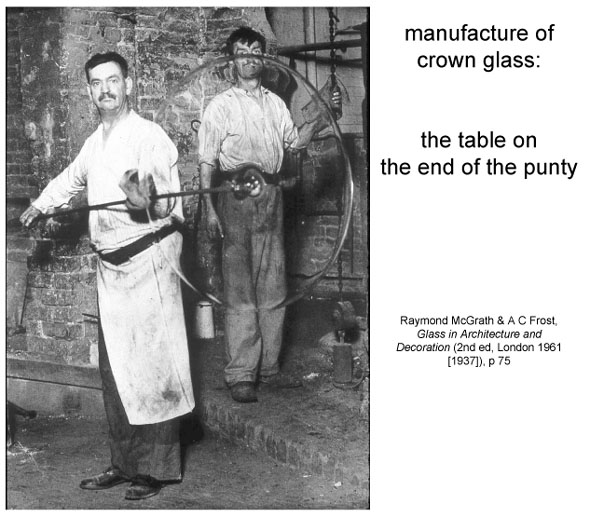
The larger size is related to the fact that these were made for the window glass. Since crown glass was a method of making window glass, the middle of the crown known as the bullseye, was considered a cheap by-product. Nowadays, since so little crown glass is manufactured, the bullseye is more valued than the flat glass surrounding it.
"Crown Glass" Today
Very few glass shops make crown glass today. One, the London Crown Glass, has a webpage featuring historical window glass manufacturing processes. No video, alas. Another company that produces some crown glass is English Antique Glass, out of Birmingham in England.
I did find this recent video of a contemporary small glass-blowing studio making a 'plate', in much the same manner that the crown glass is made. I can't help but observe that while this studio has more gadgets to play with (gas jets, rolling blowpipe holders, etc) and eager assistants to help there is not a clear sense of what they are doing, at least compared to the glassblower in the Mafarlane video.
Glass blowing dudes make a 'plate' -
In terms of big name glass artists, I can't help but notice that Chihuly's Macchia are just large colorful, textured crown glass pieces, except that the piece is held down just after being spun out and allowed to slump into the 'macchia' shape.
I know that stained glass artists such as Narcissus Quagliata and Dick Weiss have commissioned rondels, sometimes large rondels, to be incorporated into their windows and screens. Rondels are basically the same as crown glass though on a smaller scale and with no intention of cutting the piece apart.
Emeryville Child Development Center, Emeryville, CA, 1991
by Narcissus Quagliata
Cow on its Side, Seattle-Tacoma International Airport
by Dick Weiss
I don't know of any stained glass artists who have commissioned glass blowers to create crown glass - colored, textured or otherwise - with the intention of the glass being cut up for stained glass windows. I suppose the handblown object these days seems too precious an object to cut up.
There are lots of small hot glass shops springing up across the US and I would love to see one of these hot shops start to experiment with making crown glass for the stained glass artist, or at least larger rondels that could produce some interesting results if cut up and incorporated into panels.
A Personal View
In preparing for the Glass Art Society Conference in 2006, I worked with a glassbloweer in trying to make specialty rondels that I was thinking of as mini-crown glass pieces. My intention was to cut them up and make some small panels with them. This was the first example - only about 5 inches across.
The process was interesting to watch and I can see where it would take considerable practice to get the rondel big enough to be usable as crown glass, especially when variagated color is factored in.
And yes, I can personally attest to how difficult a decision it is to cut it up. As it is, we ran out of time and I only have a few of these, and I have not yet come up with a good enough design that would justify cutting them up.
April 07, 2008
Float Glass Video
Modern Clear Sheet Glass is called 'float glass' because it's created by literally floating a ribbon of molten glass on a bed of molten tin.
This is an interesting and informative video on the making of float glass though, curiously, it does repeat the myth of glass as a super-cooled liquid that will flow over time, making antique windowpanes thicker at the bottom.
The video was shot at the Pilkington company, who received the patent for float glass in 1959.
Float glass is rarely used in stained glass windows. It's considered too uniform in appearance and therefore too cheap looking. I know of some studios that only use it for heavily painted, stained and enameled pieces. They like the toughness of the glass and the fact that there is no machine or handblown texture to show through - and the cheap price doesn't hurt either. Note that if you do paint on float glass, you must be aware that enamel paint and silver stain react differently on the 'tin side' compared to the 'non-tin side'. The tin side is the side which was in contact with the tin in the process of floating the glass, and this tin will dull colors, especially transparent enamels. For instance, a nice gold pink transparent enamel could end up a rusty red instead. Unfortunately, you can only tell which is the tin side by looking at each side using ultraviolet light.
March 30, 2008
Rohlf's Stained Glass Studio Video Tour
This video was only posted on YouTube about 2 weeks ago, hosted by Jon Bonci and created for VVH-TV, a local TV station in the Hamptons. It's a contemporary view of a larger, multi-generational stained glass studio, Rohlf's Stained and Leaded Glass Studio, out of Mt Vernon, NY. This makes an interesting contrast to the Powell's/Whitefriar's video if only to see some newer and some different techniques.
Just a few things to look for - here they cut the glass from paper patterns, not on a traced drawing as in the Powell's video. In terms of newer technologies, they have an XYZ computerized glass cutting machine for larger production jobs, though there is no mention of computers for design work, or really much discussion of design work at all. Note also that they have a large flatbed kiln rather than the older pizza oven style kiln shown in the Powell's video.
It meanders a bit at 30 minutes long, but it's worth seeing the whole thing.
March 29, 2008
Whitefriar's/Powell Videos
These videos have been making the rounds on the SG forums for weeks but busy times mean I'm only getting round to posting them now. They are well worth a watch - The first is specifically related to the techniques of stained glass, as demonstrated within the studio of Powell's/Whitefriar's in England. No date given, but maybe 1950's. It's about 10 minutes long.
here's a link to the page if that doesn't work.
Note that these are English style techniques, like tracing the drawing and cutting the glass on the tracing. It's more common in the US to make multiple copies of the working drawing and cut up one copy to make paper patterns.
Also, it's interesting to see one of the older 'pizza oven' style kilns in operation, where the painted glass is fired by moving it from a warming chamber to a firing chamber to an annealing chamber, making it possible to continuously fire pieces, essential at a time where almost all the windows produced were painted.
There is another video related to Powell/Whitefriar's, though this time a recent video looking back to the studio through a visit to Grace and Holy Trinity Church in Kansas City, Missouri..
If this isn't working here's a link to the page.
These are on Blip.tv, which I think is better at this point for videos related to stained glass than YouTube. YouTube is already cluttered with way, way too many bad how-to videos, and the search capabilities don't help much.
Still, I've been scouring though SG-related videos over the past few weeks and will be posting more videos as the fancy strikes me.
January 15, 2008
Googlebooking Stained Glass
Some mention on the Stained Glass H-net Forum recently of an old stained glass book being available on the web. So, being a curious fellow, I tried out a search at Google Books. It has a clunky and slow interface, but if you search a bit there are some interesting finds, especially old obscure books that are available in their entirety since the books are long in the public domain.
Searching for 'stained glass', I did find it -
Decorative Painters' and Glazier's Guide by Nathaniel Whittock, this edition with a publication date of 1828. This book is interesting as an early stained glass "How-to" book, especially in that this was well before the age of the stained glass supplier, so there are recipes in here for making the glass (though not descriptions of HOW to make the glass), as well as recipes for making your own paint and silver stain. Mostly the book concerns itself with methods of painting and staining on clear crown glass. Pages 204-304 are the ones related to stained glass.
This plate of illustrations comes just before page 243.
It is one of only a few hand-colored plates in the book.
This page contains paint formulas.

If you are truly interested in giving this a serious read-through, then I would recommend downloading the pdf and printing out the stained glass section.
Another full book about stained glass is this one published in 1922 - Stained Glass, by Alfred Werck. You can tell he's a little bristly, and opinionated by the subtitle -
"A Handbook on the Art of Stained and Painted Qlass, Its Origin and Development From the Time of Charlemagne to Its Decadence (850-1650)". Personally, I like decadent stained glass....
October 30, 2007
Silver Stain Roundels
Ah, the wonderful world of the stained glass roundel, painted scenes on clear glass with yellow silver stain as the only color.
A roundel depicting theTemptation of St. Anthony. German, possibly Swabia, 1532.
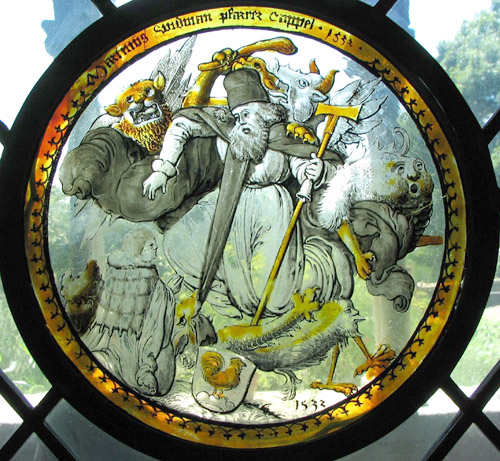
from a Cloisters flickr set by 'isefire' of a trip to The Cloisters which includes images of more than a dozen of these types of roundels. If you like that, try a general search on Flickr for 'Cloisters stained glass'. Well worth a browse.
and a closer view -

Some additional info on the phenomenon of the silver stain roundel can be seen here - Netherlandish Roundels at the Victoria and Albert Museum.
If you are interested in more specific technical information about silver stain, check out this article by Cliff Oster on The Making of Ancient Walpole Silver Stain" (pdf), from The British Society of Master Glass Painters; and then this article on Glass Colouring from the Institute for Historic Building Conservation; and finally, you can download a highly technical article called The colour of silver stained glassanalytical investigations carried out with XRF, SEM/EDX, TEM, and IBA (pdf), from the Journal of Analytical Atomic Spectrometry.
December 28, 2006
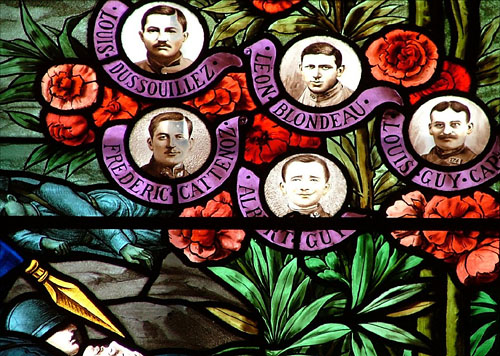
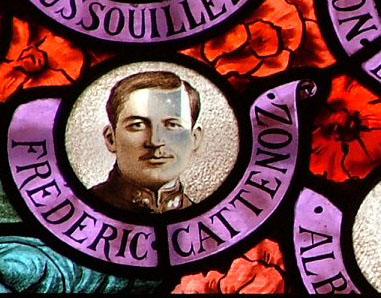
French War Memorial
Seen recently on Flickr - again from Simon_K
The Commune of Ney is a rather scruffy suburb of Champagnole, but the parish church is beautiful. It has also benefited from some rather striking 1920s glass, including this extraordinary war memorial window. It depicts Mother France standing on a battlefield, and offering up her dead children to Christ. Each soldier is represented by a fruit which is being plucked from a tree, but the face of each of them is a real photograph. I had never seen anything like this before.
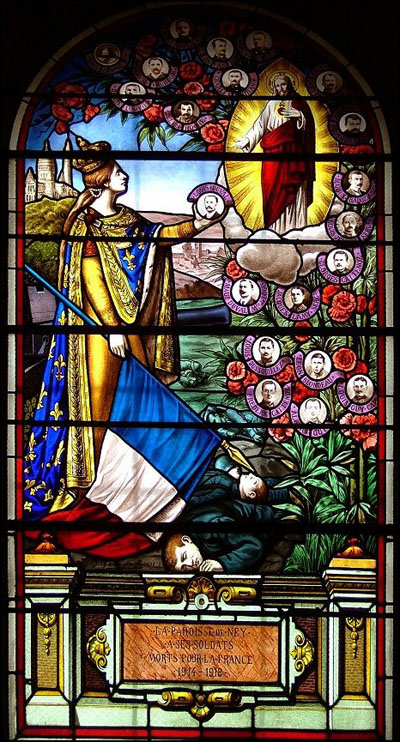
At first glance the circle portraits appear to be transferred from actual photographs by some mechanical means (decal, screenprint, etc.). But looking at the closer shots I think they are painted in the standard painting method of trace and matte, only in a very photorealistic style and almost certainly based on actual photographs. Still, it makes for an interesting stylistic mashup.
one closer shot
and an even closer look
Peace on Earth
April 04, 2006
Sneak Peek v.2
Part 2 of the preparation for the G.A.S. conference demo -
Playing with pressed glass, partly because my own glassblowing skills are very limited and partly because the idea genuinely intrigues me. I like pressed glass and I have not heard of many incidents of pressed glass being made specifically for stained glass. The first attempt was a little shaky, with problems in timing and heat and technique and annealling to deal with - leading to some thermal shock and some cracked, but still usable, pieces. I'm working with some graphite that was given to me - very nice, if very messy, to work with.
This is the most interesting little bit that survived - a new 'TK' signature.
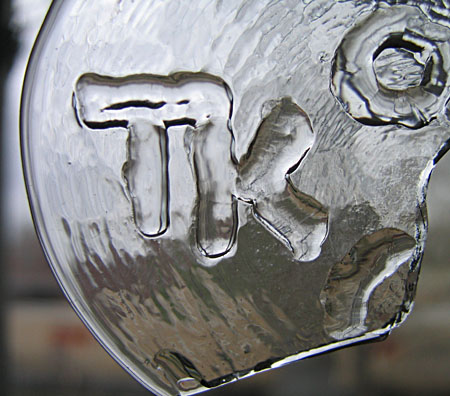
Here is the test mold on which the glass was pressed.
It's made of graphite and carved with a dremel.
March 17, 2006
Enamel FAQ
A good resource from Don Burt via the Stained Glass Forum on yahoo groups -
February 16, 2006
Via Vitro begins
from the yahoo group "stained glass forum"
introducing Via Vitro -
...I am on a stained glass travel study with fellow beginning stained glass artist Stephane Ruault. We are in India now following Roman trade routes and visiting villages where ancient techniques of glass fabrication are still in use in order to get an idea of what primary production may have been like back when stained glass first came into being. We will be traveling to 8 other countries before we are home. If you would like to follow us a bit or check in to see what we are doing, we will be writing a blog during our 8 months away...
It should be interesting to follow this in the coming months. I hope they include pictures in future posts.
December 03, 2005
Michelli Updated
I got a note from Pippin Michelli, Ph.D of Art History with Michelli that the Stained Glass History section has lots of updated links and new sites it's linking to. I had noted this site almost 2 years ago and it remains one of the best and most varied sites for stained glass links I've come across.
September 18, 2005
Lettering know-how
Today's entry in the category of "Things stained glass artists need to know about" - Typography.
A good website to start with is Thinking with Type. It's important to note that these ideas like tracking and kerning come into play whether the letters are being drawn by hand or generated on a computer and then transferred in some manner to glass. They also come into play whether the lettering is for decorative purposes or pure utility.
March 03, 2005
Fabrication Process for a Small Panel
I designed a small wine and grape themed panel for a local arts auction.
Here is the fabrication process.

-----The pattern pieces have been cut and the cutting of glass begins. I've just cut the green tint for the background.
-----At first the palette is on the light table while I select out scraps of glass that might be used.
-----The palette is then propped up in the window and the pieces are waxed up one by one. When doing these smaller panels I often cut out 2 panels at once. That way I can pick and choose to make the best panel and still have the possibility of another after that. Sometimes I'll scrap the extra if it doesn't work out. In this case I'm making a second with a blue grey background. This is partly to cover myself if the silverstain does not work out well in the tint glass for the background.
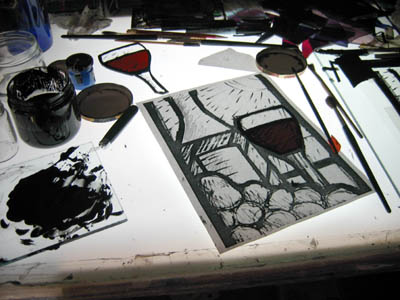
-----Trace painting.
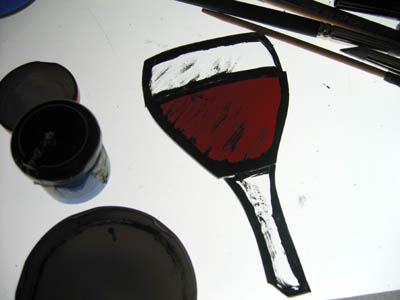
-----closer view.
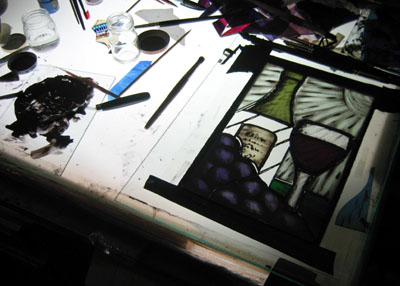
-----I don't have to fire these before I do the tonal but I'm more used to it that way. This is the tonal painting - the paint brushed on and blended, then the light areas picked out with stencil brushes. The mess and dust of this process is the main reason I switched over to all non-lead glass paints. I have not noticed any difference except for improving my peace of mind about working with the stuff.
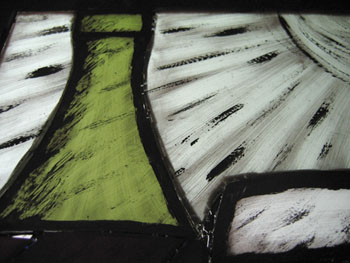
-----Close up of the tonal painting
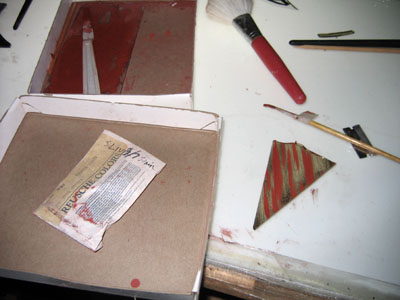
-----Silverstain is applied. This shows the method, though the pieces for the panel were already in the kiln by the time I remembered the camera. The silverstain compound (silver nitrate) is applied with a brush to the back of the piece. It is blended lightly (unless you want distinct orange outlines around the silverstain areas), then fired in at a relatively low kiln temperature. The silverstained should not touch metal and the brushes. Also, the blender etc must all be seperate from the ones used for regular vitreous paints.
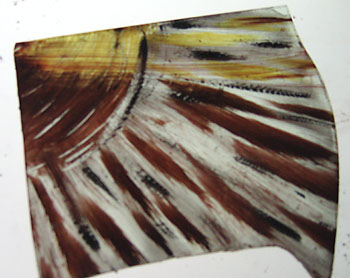
-----After the piece is fired (to about 1100 degrees fahrenheit) the red brown residue is wiped off to reveal the clear yellow stain in the glass.
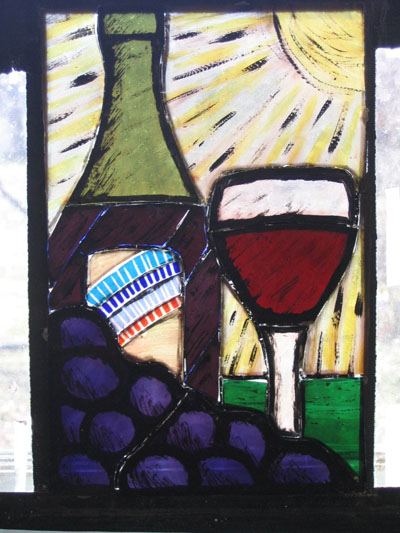
-----The final wax up before assembly. I had though of adding this stripe to the label area. When I saw it waxed up with the yellow dominant background, the two areas seemed to fight each other. As much as I like the stripe area it just calls too much attention to itself.
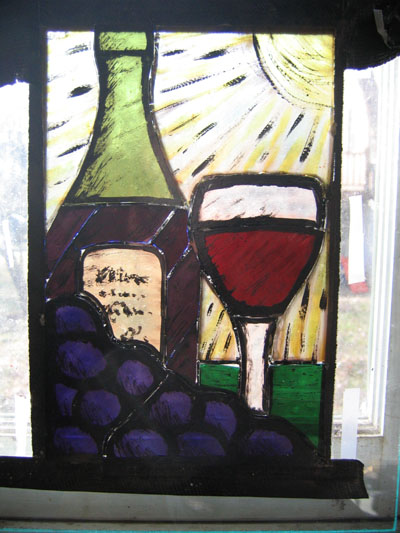
-----I went with the simpler single piece for the label.
Now it's all ready to assemble.
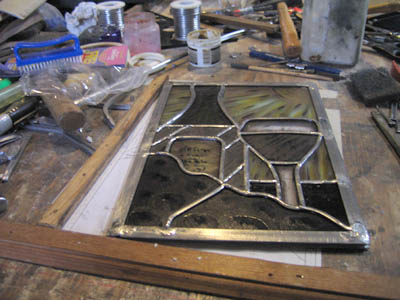
-----Just after assembly. Again, I finished the panel before I remembered to take any pictures with the camera.
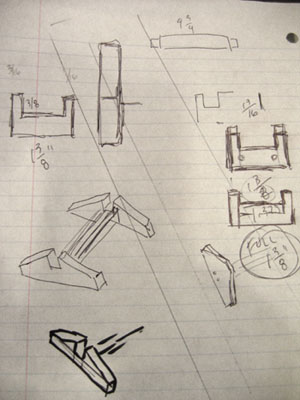
-----I wanted to make this panel so that it could be displayed on a stand or hung in a window. I started with some design ideas for the stand.
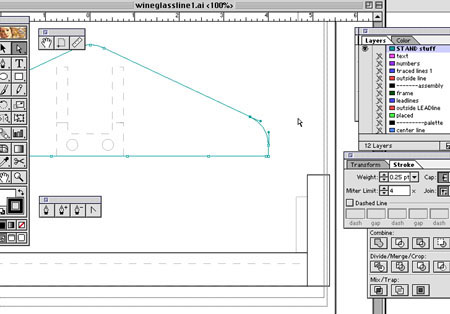
-----Translated those into more specific computer drawings
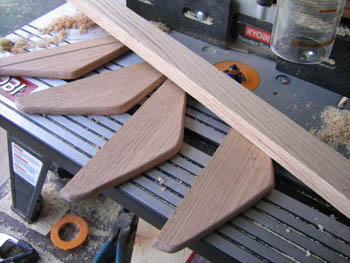
-----Start cutting the pieces.
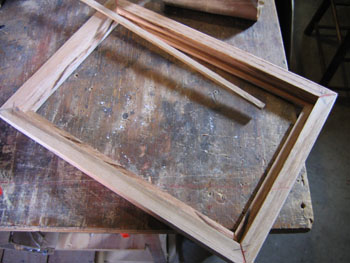
-----Assemble the frame itself.
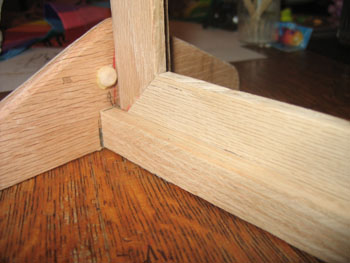
-----Note the change from the drawing. the original idea was to have two small rails on the side to hold the panel. It worked out better to put button size plugs in to hold the panel.
-----The finishedpanel in its stand.
-----This is the panel in sunlight.
February 22, 2005
Design process for a small panel
I am designing a small panel to be donated to an auction raising funds for a local arts organization, Art St. Louis. It's to be auctioned at a wine tasting event, therefore I'm thinking of a simple wine and grape theme. I begin with some thumbnail sketches for idea generation.
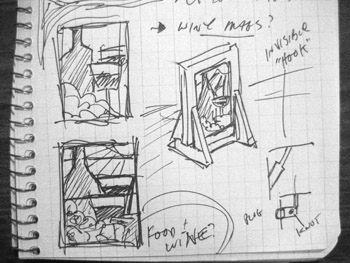
The first sketch of any kind was done in my journal.
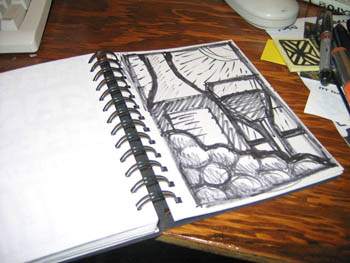
The next drawing, larger though not necessarily full size, was drawn in one of my sketchbooks. I keep anywhere from 2-5 sketchbooks going at any one time. I currently have 3 going - one larger, one smaller and one strictly for color drawings. This is in the 'smaller' sketchbook - the area for the drawings being about 4.25" x 6.75". I'm seeing the final panel as larger than that - about 7.5" x 10" or thereabouts. This being an autonomous piece, I'm not bound by any specific size. I'm thinking of it being a painted panel using nice antique glass, and one that might be put in a window or placed in a stand.
This happens to be the first sketch I drew in the sketchbook - I like it fine and think this is what I would like to go with. And yet I can't help that one drawing is not enough. So, to be sure, I did some other sketches, none of which I like as much.
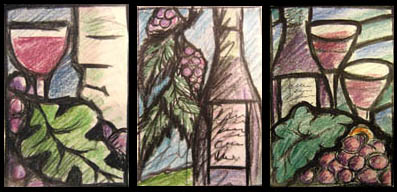
Other drawings (done in the 'color' sketchbook) - But I still like the first one the best.
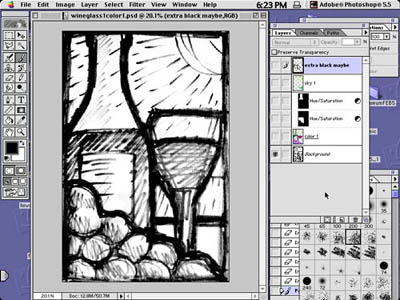
---- After scanning it, I bring it into Photoshop.
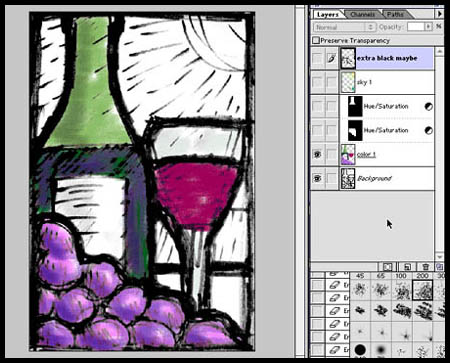
---- The first layer gets color.
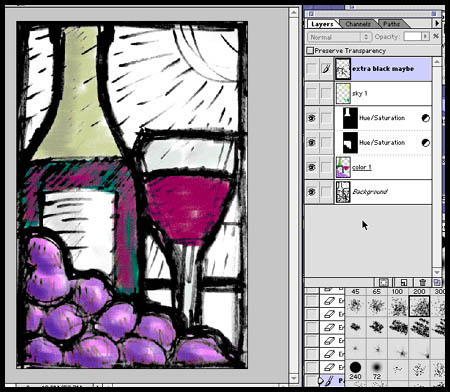
---- Then I do some minor color adjustments. I'm already starting to think of glass, the area in the bottle with the wine being perfect for some smaller scraps of gold pink English streaky that I've had for years.
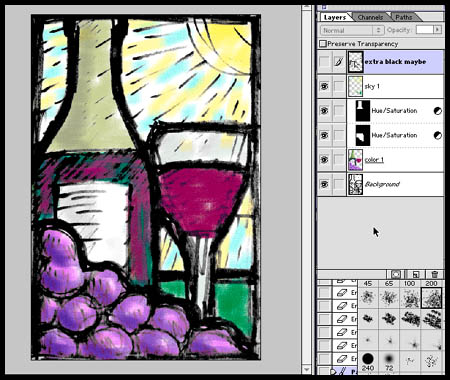
---- Then the color for the sky goes in on a seperate layer. I'm thinking of a light tint with flecks of silverstain for the sky. Perhaps enamels, but maybe not. Again, this may change when selecting glass. I might also try 2 different backgrounds, as there are not many pieces in this panel.
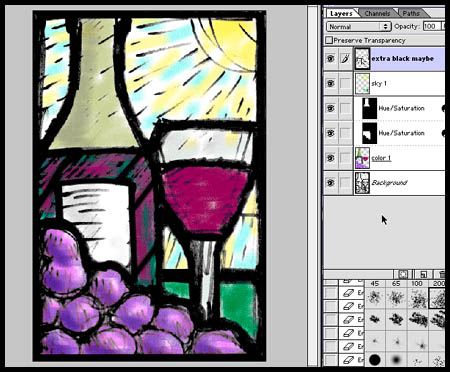
---- I then add black in a seperate layer to firm up the composition and add some break lines. Especially breaking up the 'wine' in the bottle to make sure I could use those nice but small antique english streaky scraps that I would like to use. If this were a commission I would print this as a color sketch and present it to the client.
Then I extract out the black and make into a bitmap file. This is the end of the Photoshop part of the process. Now the bitmap file gets imported in Illustrator. Basically, I use Illustrator as a CAD program. There are many designs that I do directly in Illustrator, especially larger works. I made the decision many years ago to go with Illustrator over an architectural CAD program (such as PowerCad or ArchiCad on the Mac or AutoCad on the PC) because the tools in Illustrator tend to lend themselves to more creativity. At least that's how I see it. I've never regretted the decision, other than the odd feeling I have from knowing I may be the one and only person using Illustrator in this way. I certainly have never heard of anyone else using Illustrator to design stained gass windows. I do know there are plug-ins available that will broaden the tools in Illustrator to make it into a more conventional CAD program. I haven't found I've needed them.
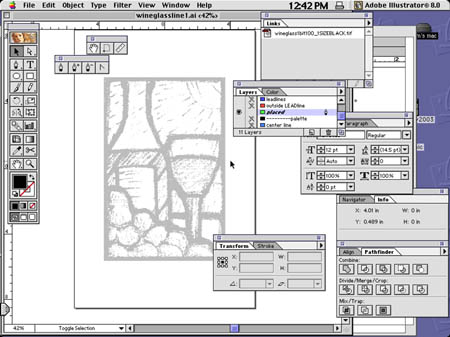
---- I place the bitmap file into a new layer in Illustrator, and dim it 50 percent.
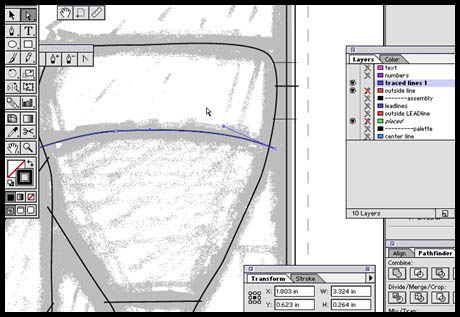
---- Then, using the pen tool, I 'trace' out where the leadlines will be.
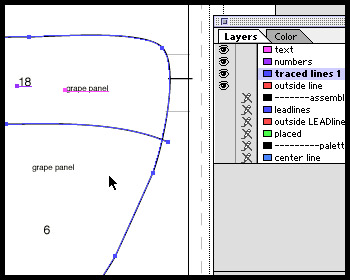
---- I then number and label the pieces. On a panel this size the whole process in Illustrator might take 20 minutes at most.
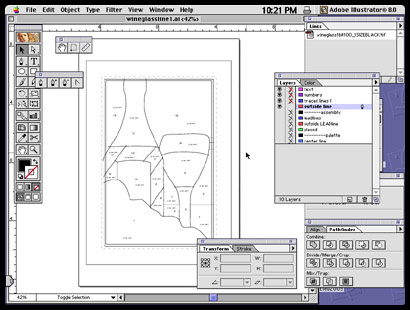
---- The pieces are ready for printing.
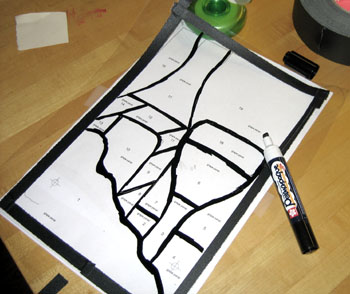
---- After printing the paper copies, I trace out the leadlines onto a sheet of acetate with an opaque paint marker. You might notice I have already made one small change. The wine glass is now going to be clearly in front of the wine bottle. It seemed to me too uncertain in the design after printing it out.
---- The other transparency is one printed from the Illustrator file with the placed bitmap included. This I use to select glass intially.
Next phase - Glass selection and painting...
January 28, 2005
'Story behind the panel'
A new feature on the main website starting with the story of the technical exercise behind this panel - Pink Angel .
January 15, 2004
Michelli Stained Glass website
Some time ago I came across an interesting site that is makes for a good intro to stained glass techniques - it is basically a list of links to other sites, with descriptions of what is to be found. Some links are better than others -
but here it is --->The "Art History with Michelli" page on Stained Glass (link updated 12/2005)